
By Celia Thomas
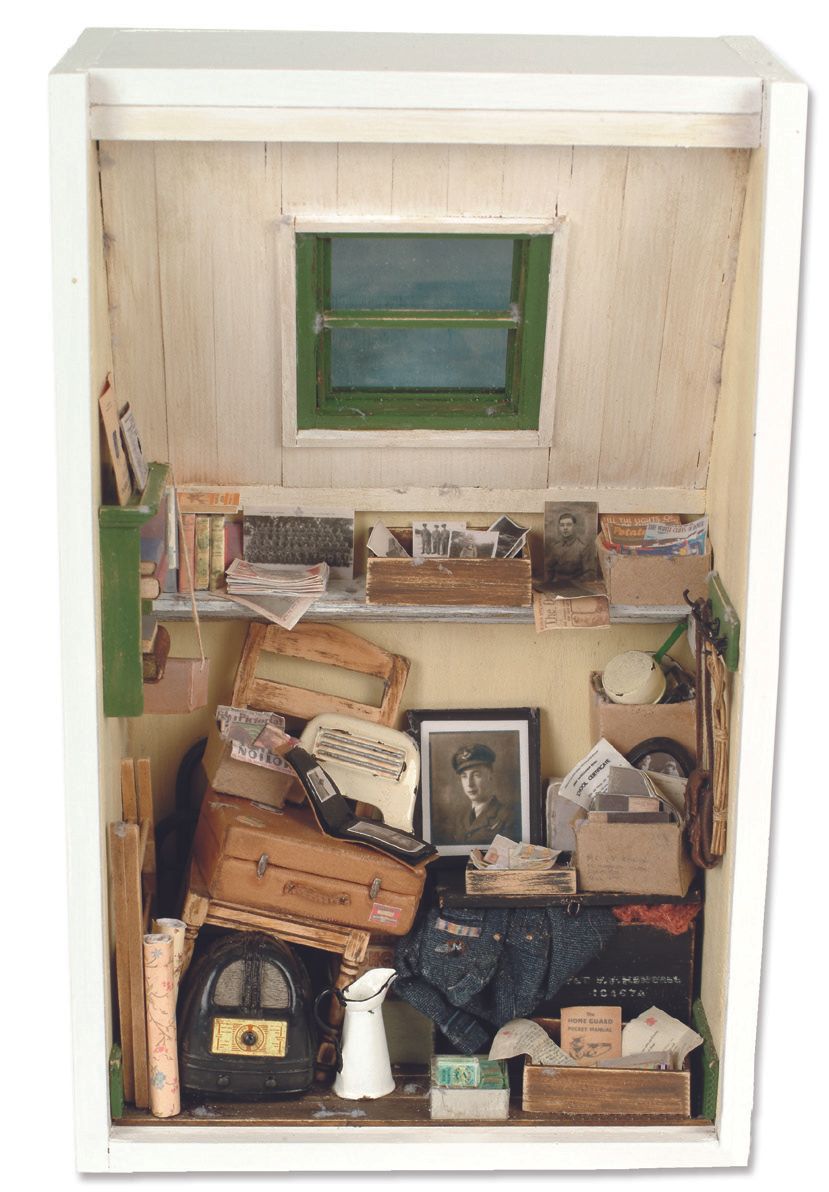
The aim of this project was to create an old, neglected attic room with a feeling of nostalgia with reference to the two world wars. The room is full of mementos from the 1930s/40s.
Many of the printed items have been scanned on the computer from my own family photos, documents and books and scaled down. If you can do this your project is that bit more special for you, or the person you are giving it to for an anniversary, birthday or perhaps retirement present.
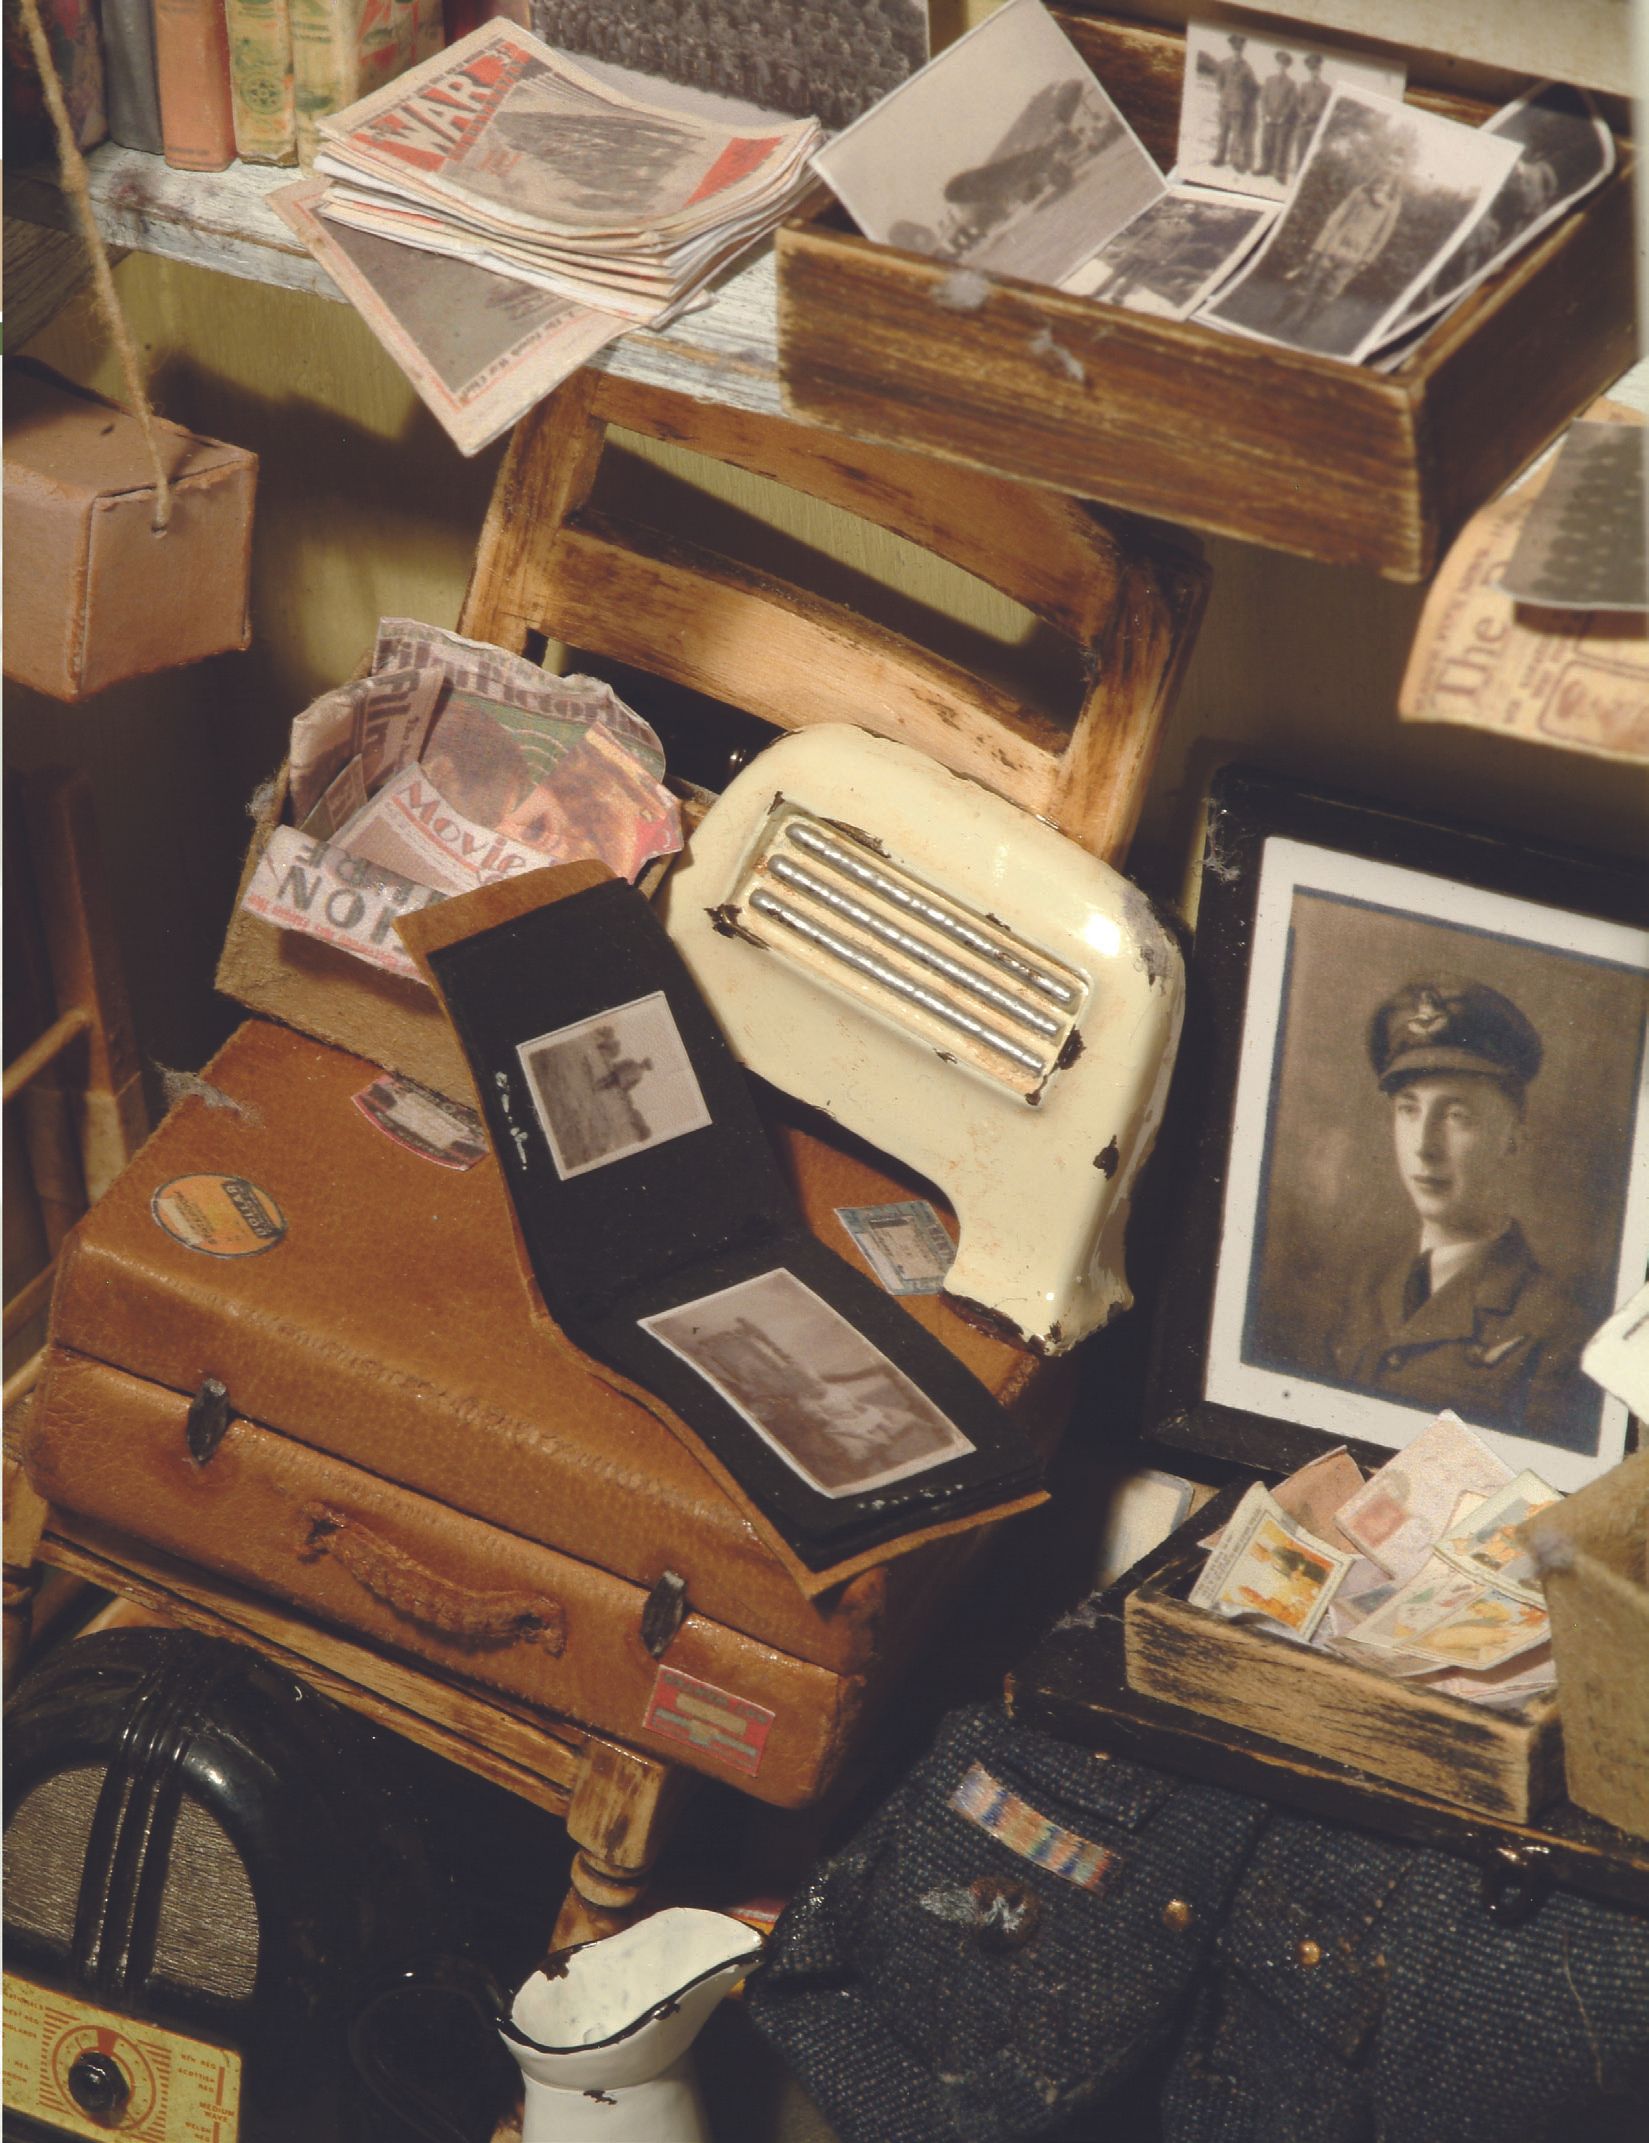
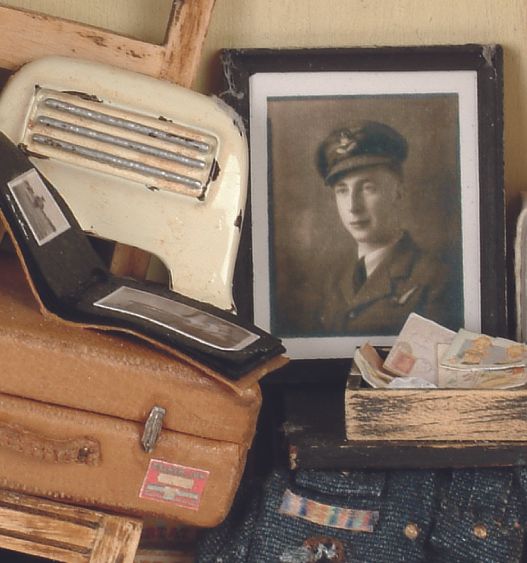
If you do not have the facility to do this then you can find photos in magazines, catalogs, and advertising leaflets. I also used some of the items that I used to sell in my miniature business such as the 1930's Bakelite Wireless, 1930s Electric Fire, slightly aged water jug, gas mask box, gramophone records, and War Illustrated magazines.
You will need:
Raw umber acrylic paint | Small paintbrush | Plain white paper towel
Vintage suitcase: Leather from an old glove | Wood for top half 1/4” x 2” x 1 1/2” | Wood for bottom half 1/2” x 2” x 1 1/2” | Leather for top half 3” x 3 1/2” | Leather for bottom half 3 1/2” x 4”
Leather Satchel: Cut out the following pieces - Main piece, 2.” x 1 1/4” | Two sides, 3/4” x 1/2” | One pocket, 1/2” x 3/4” | Strap, 4” x 1/16”
How to age an object
Step 1: Mix the paint with a considerable amount of water. Cover the object and dab with paper towel to remove excess paint, leaving just enough to give a slightly aged and dirty look.
Step 2: On items, such as boxes, you might like to add a little more paint to creases and corners.
Creating books
The book covers were made by scanning full size books and then reducing them in size and printing them on card. The leather Bible is simply made from a rectangular piece of leather and a piece of wood .” depth, cut so that it is slightly smaller than the leather cover. Glue with PVA and edge all the way around with gold marker pen, including the wooden insert, to give a grand finish. I also cut a small piece of narrow red ribbon and sandwiched this in place between the front cover and the wood.
Wooden boxes
These are simply made from scrap pieces of wood strip and finished with acrylic paint. Sand well to give an old look. The wooden box on the shelf has been filled with scanned family photos that were reduced in size. The wooden box on top of the chest has been filled with old letters that were cut out of a magazine and some 1940 postcards.
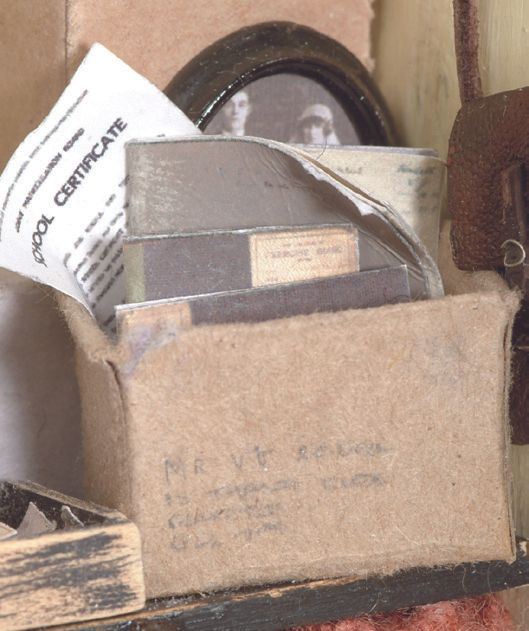
The box on the floor contains wartime printed items, such as identity cards and ration books. Some personal documents were scanned and reduced to scale, such as my grandfather’s letter from the King on his release from the prisoner of war camp at the end of the First World War, and a letter from the King at the end of the Second World War for services rendered to the Home Guard. The medals were copied from my dad’s wartime medals and made out of card, coloured in with gel pens and aged slightly with raw umber paint.
Family photographs have been scanned and reduced in size and printed on matt photographic paper. To make the large photo frame I used a strip of picture frame, cut to size using a miter block and painted with Paynes grey acrylic, which is a soft black. The photo was glued on thin card and the frame glued on top using PVA glue, taking care not to get any on the photo.
The metal oval picture frame, that you can just about see, has been bought and painted in black enamel paint. The photo was stuck on card that was cut to fit the frame and then very carefully, with a minimum amount of glue, stuck to the back of the frame.
Old boxes
The cardboard boxes were made from an assortment of coloured card and old file covers and made to look scruffy by rubbing a pencil over the edges and rubbing a finger over the top. Scratching with a craft knife gives a more battered look.
The box on the shelf has been filled with 1930s/40s song sheets that were scanned from a book and reduced. I overlapped some to give a more random look. The box on top of the suitcase has been filled with 1930s magazines.
On top of the wooden chest is a box filled with school exercise books, a school report, and a school certificate that were all scanned from the real thing, reduced to scale and printed on quality paper. I gently rubbed the exercise books with pencil, particularly around edges, and smudged with my finger to give it a dirtier look. I also rubbed my fingernail over all the edges to rough them up.
On top of that is a box filled with broken items such as a saucepan that has a hole in it, a broken toaster, and a misshapen 1930s clock. Between the chair and the chest is a box filled with old boxed games. These were made out of card and the front covers were scanned from a book and then glued onto the lids.
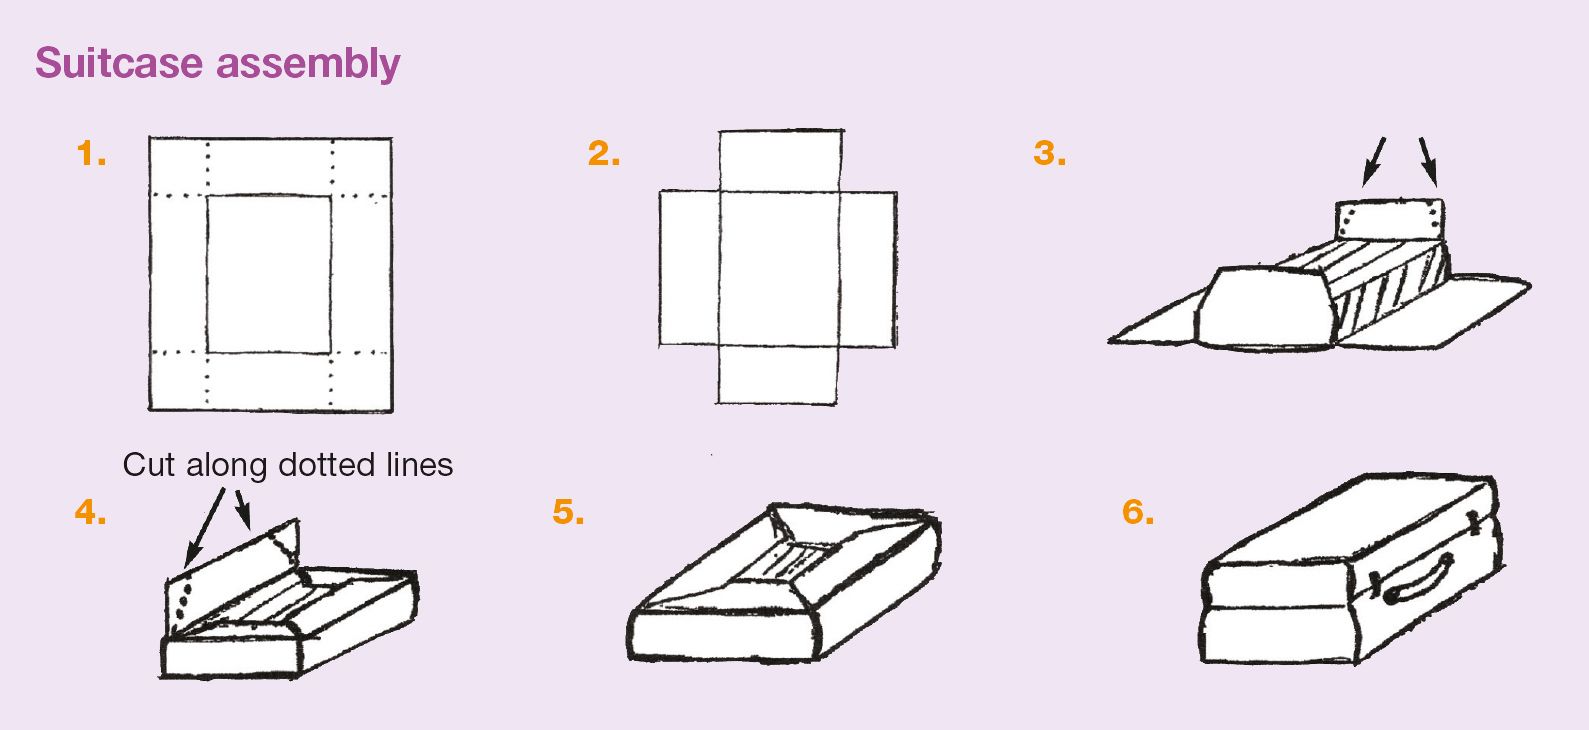
Vintage Suitcase
Step 1: Stick the wooden block onto the middle of the corresponding leather. Cut along dotted lines as shown.
Step 2: The sections should now look like diagram shown below.
Step 3: Glue short ends to block as shown one at a time, then trim along the dotted lines at each end. Fold flaps down then glue.
Step 4: Glue long ends to block as shown, one at a time then trim along dotted lines at each end. Fold flaps down then glue.
Step 5: The top and bottom halves should now look like diagram below. Stick both halves together, weigh down with heavy book or clamp whilst glue dries.
Step 6: The handle was made from a long piece of the inside seam of the glove cut 3/4” in length, secured onto the lower half of the case by two tiny pins. The two catches were broken off a piece of old jewellery and glued into place with PVA glue then touched up with a little raw umber acrylic paint.
Step 7: The four corners were also touched with raw umber paint and to age the case further a craft knife was dragged along all the corners and edges. To finish, I cut some old luggage labels and stuck them on with PVA glue.
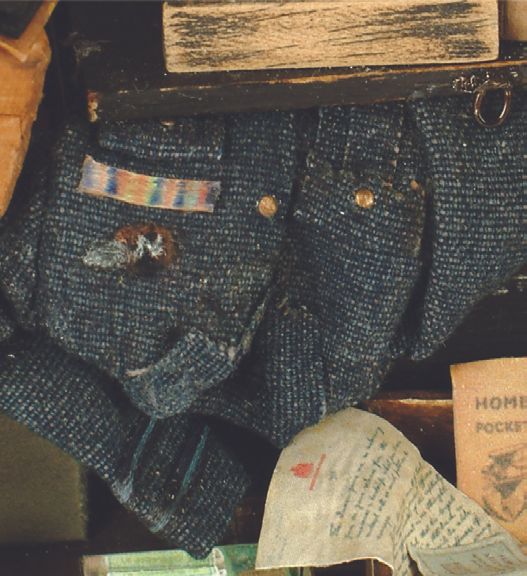
Making the RAF jacket
The RAF jacket, which was based on my dad’s real old navigator’s wartime uniform, was quite difficult to make. I tried to be as accurate as possible when making the ribbons and medals, in order to be authentic. It is tiny details like this that if wrong, could spoil a whole scene.
I painted the material (an old pair of my daughter’s denim shorts) with a very weak wash of raw umber acrylic paint and lots of water then dried the material on the radiator between coats. It took six coats of paint before I reached the desired shade.
Measuring the real jacket as a guide I cut out the parts and reduced them to scale. I sewed the basic structure of the jacket and set in the sleeves, however, the other details such as the collar and pockets I glued in with PVA glue.
The Flight Lieutenant ribbons on the cuffs of the sleeves were made out of a narrow strip of white ribbon painted in black acrylic paint (as I couldn’t get black ribbon).
Using a light blue gel pen and a steady hand I drew a line down the middle. The ribbons were then fixed into place with PVA glue. The ribbon on the top of the jacket was made out of white ribbon coloured in with gel pens.
The winged badge was made in black felt and the emblem drawn with gel pens. The buttons were made from tiny blobs of PVA glue dropped onto tin foil from a cocktail stick and left overnight to dry. The next day I scratched them off carefully, painted them in gold enamel paint, and then stuck them into place with PVA glue.

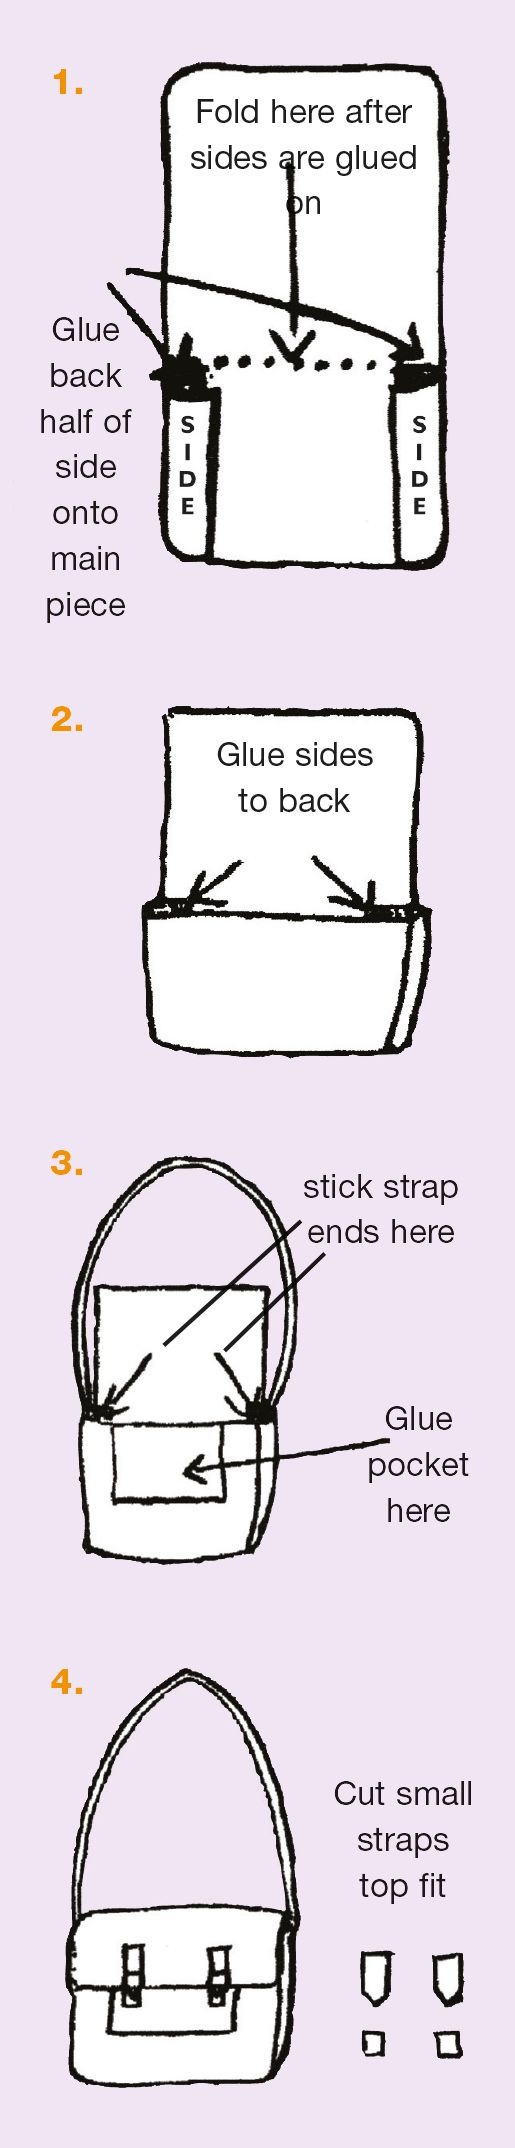
Leather satchel
This was made from a piece of dark brown leather and then glued with PVA.
Step 1: Fold the sides in half. Make sure that the crease of the fold is on the outer side of each side of the satchel. Glue only the back half of the sides to fit one end of the main piece as shown. Fold the main piece in half along the dotted lines.
Step 2: Glue the other half of the sides to the back of the main piece, so now you should have a basic satchel shape.
Step 3: Glue the pocket to the front and the strap to each side of the satchel inside, where shown.
Step 4: Fold the flap, dab a little glue to keep it together. Cut small straps out of the scraps of leather, as shown, and glue in place. Make two wire buckles with small lengths of 5-amp fuse wire. Shape it with pliers or tweezers, and then glue it in place. Running a craft knife along all edges aged the entire satchel a little.
Ideas for other items
The photograph album was made from a rectangular piece of coloured card and black paper. I stitched them together starting at the top of the spine working downwards. I scanned some family photos and glued them on two of the pages. Then using a fine white gel pen, created some miniature writing under each photo.
I scanned the front cover of a First World War newspaper from a book and then reduced it to scale and folded it to look like a newspaper.
I made the cobwebs from tiny pieces of lint I got from the tumble dryer filter. I managed to tease it out and then stuck it into place using a cocktail stick and minute specks of PVA glue.
Top tip: Half fill the cardboard boxes with twisted up tissue paper before piling your objects on top, to give the illusion of a full box