
by Debbie Booth
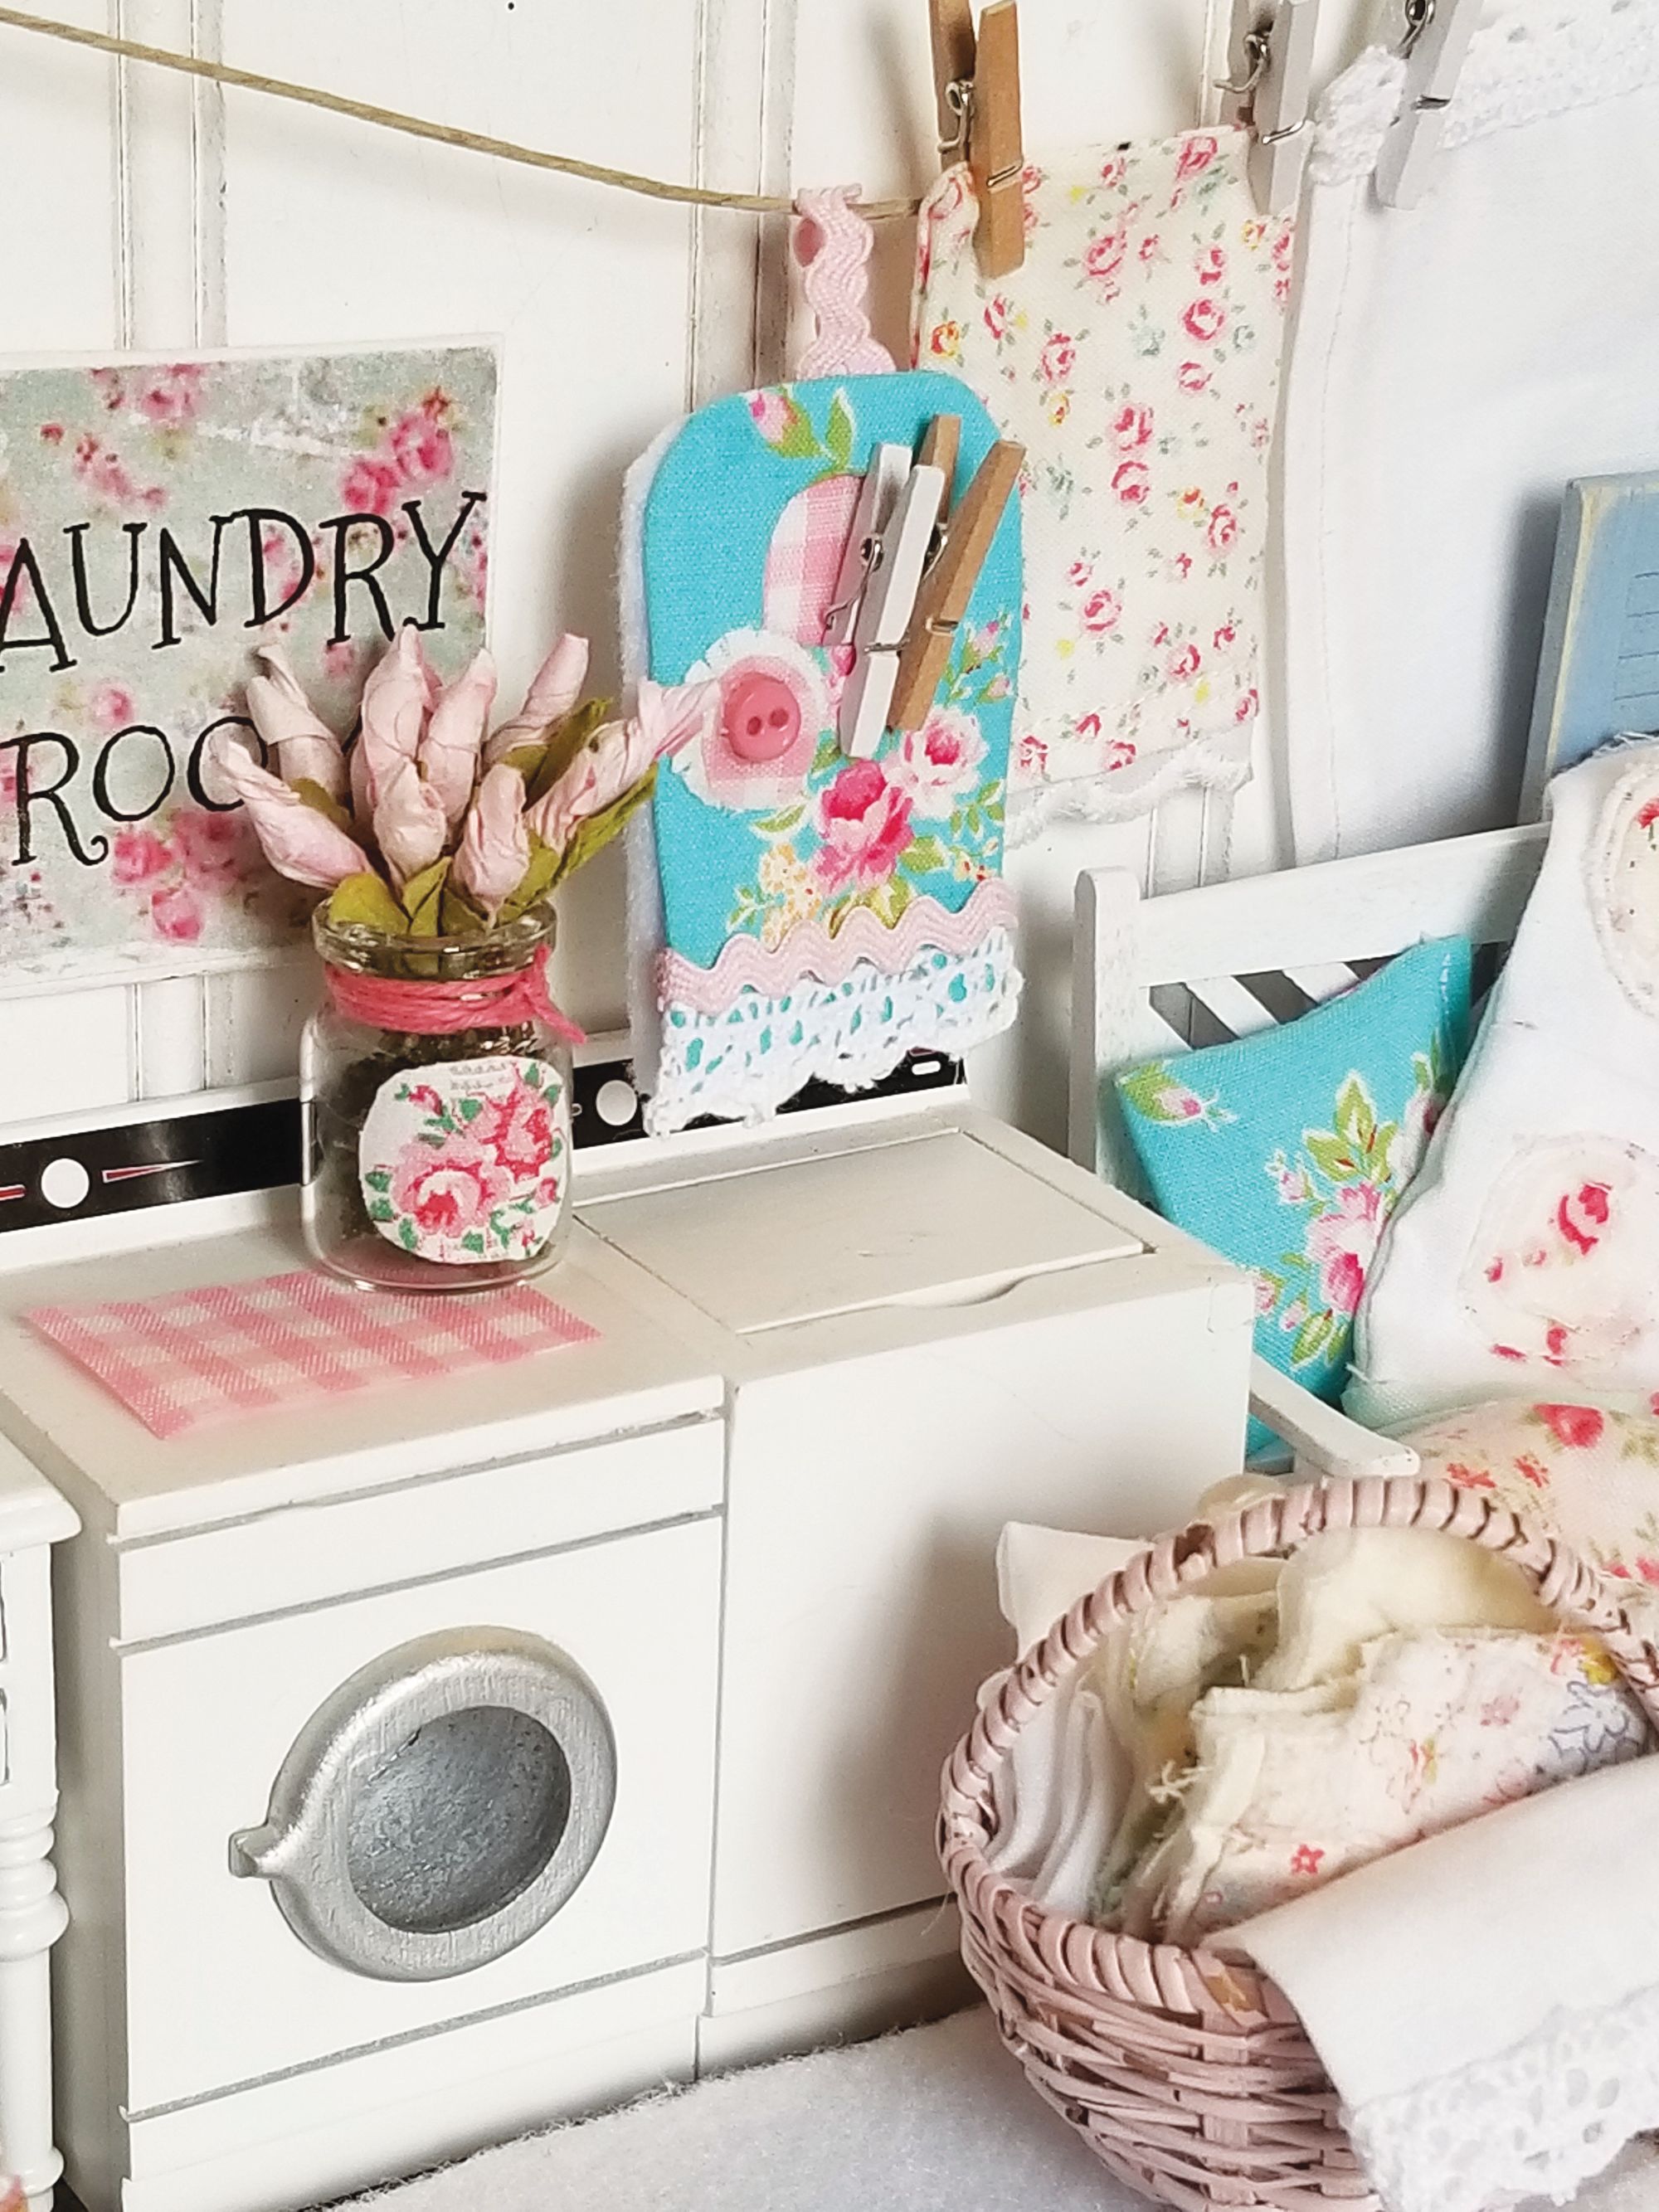
I will be sharing simple directions for making a decorative peg bag. The final measurement is approximately 1” x 2”.
You will need: Ruler | Card stock paper | Pencil | 5” square cotton fabric with small floral design | 3” square wool felt | 7” tiny rick rack | 5” square gingham | 7 1/4” cotton lace | 1 tiny button |3 or 4 tiny clothes pegs | Tacky glue | Toothpick | Scissors
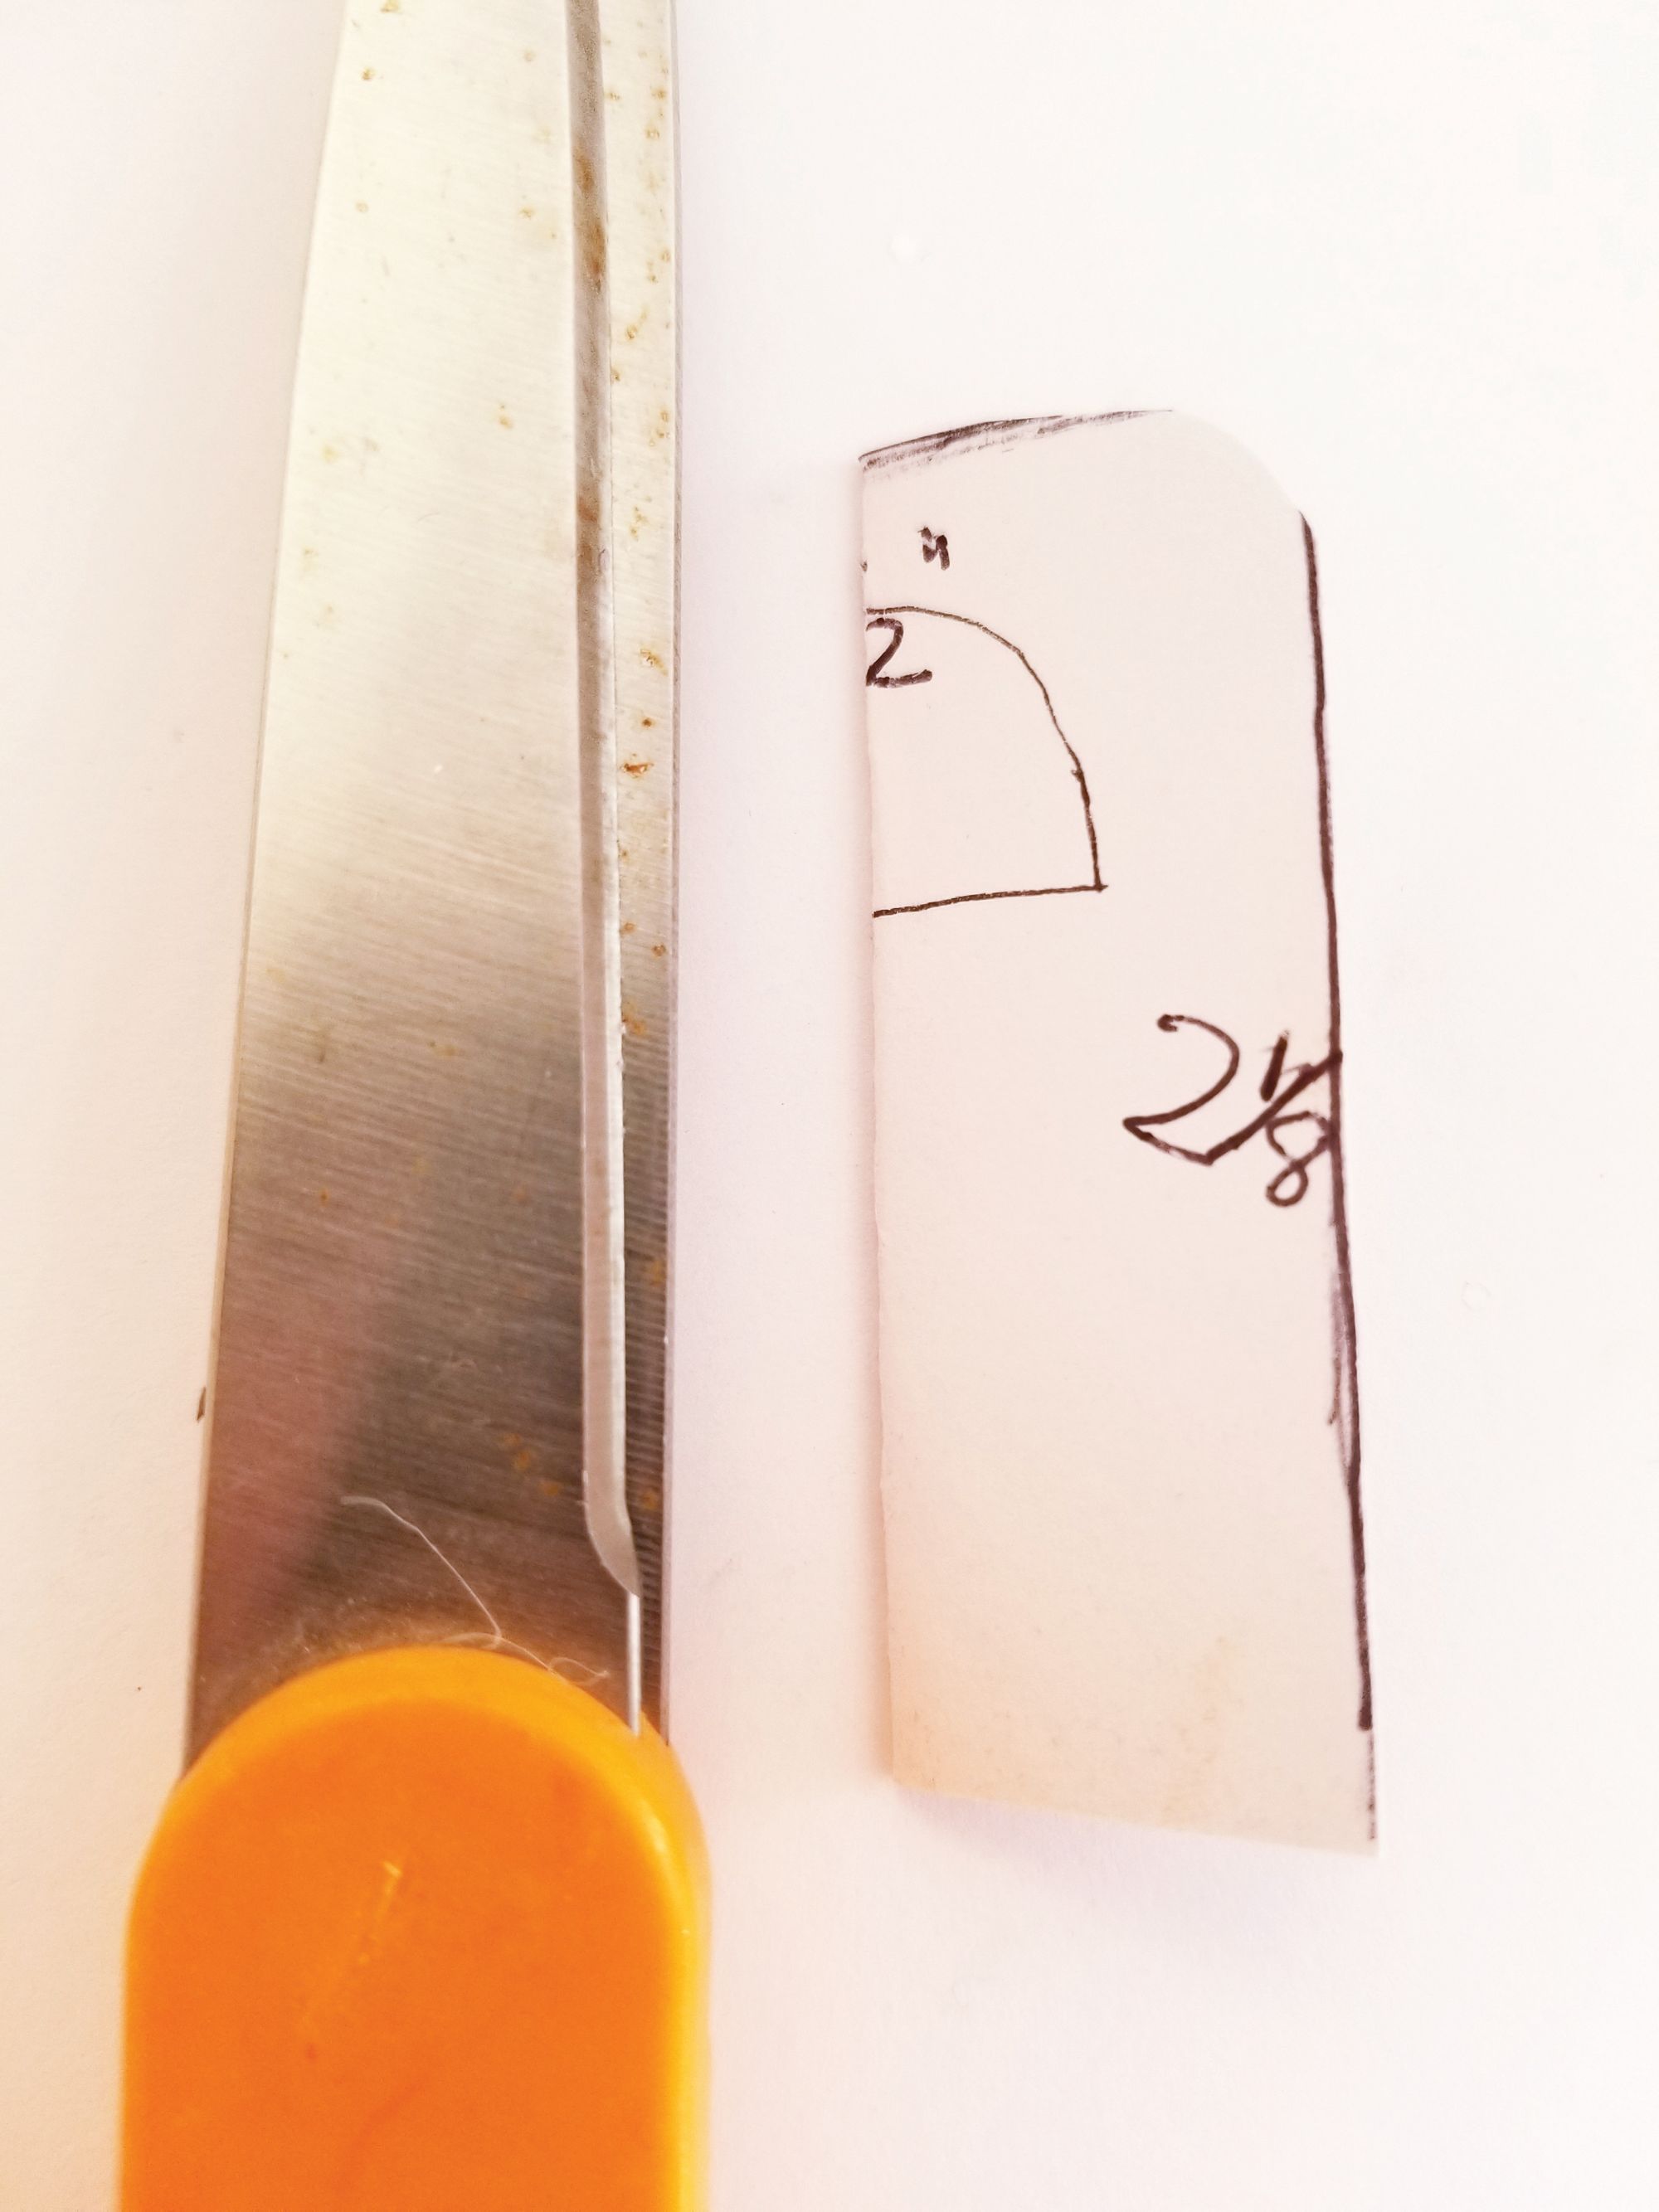
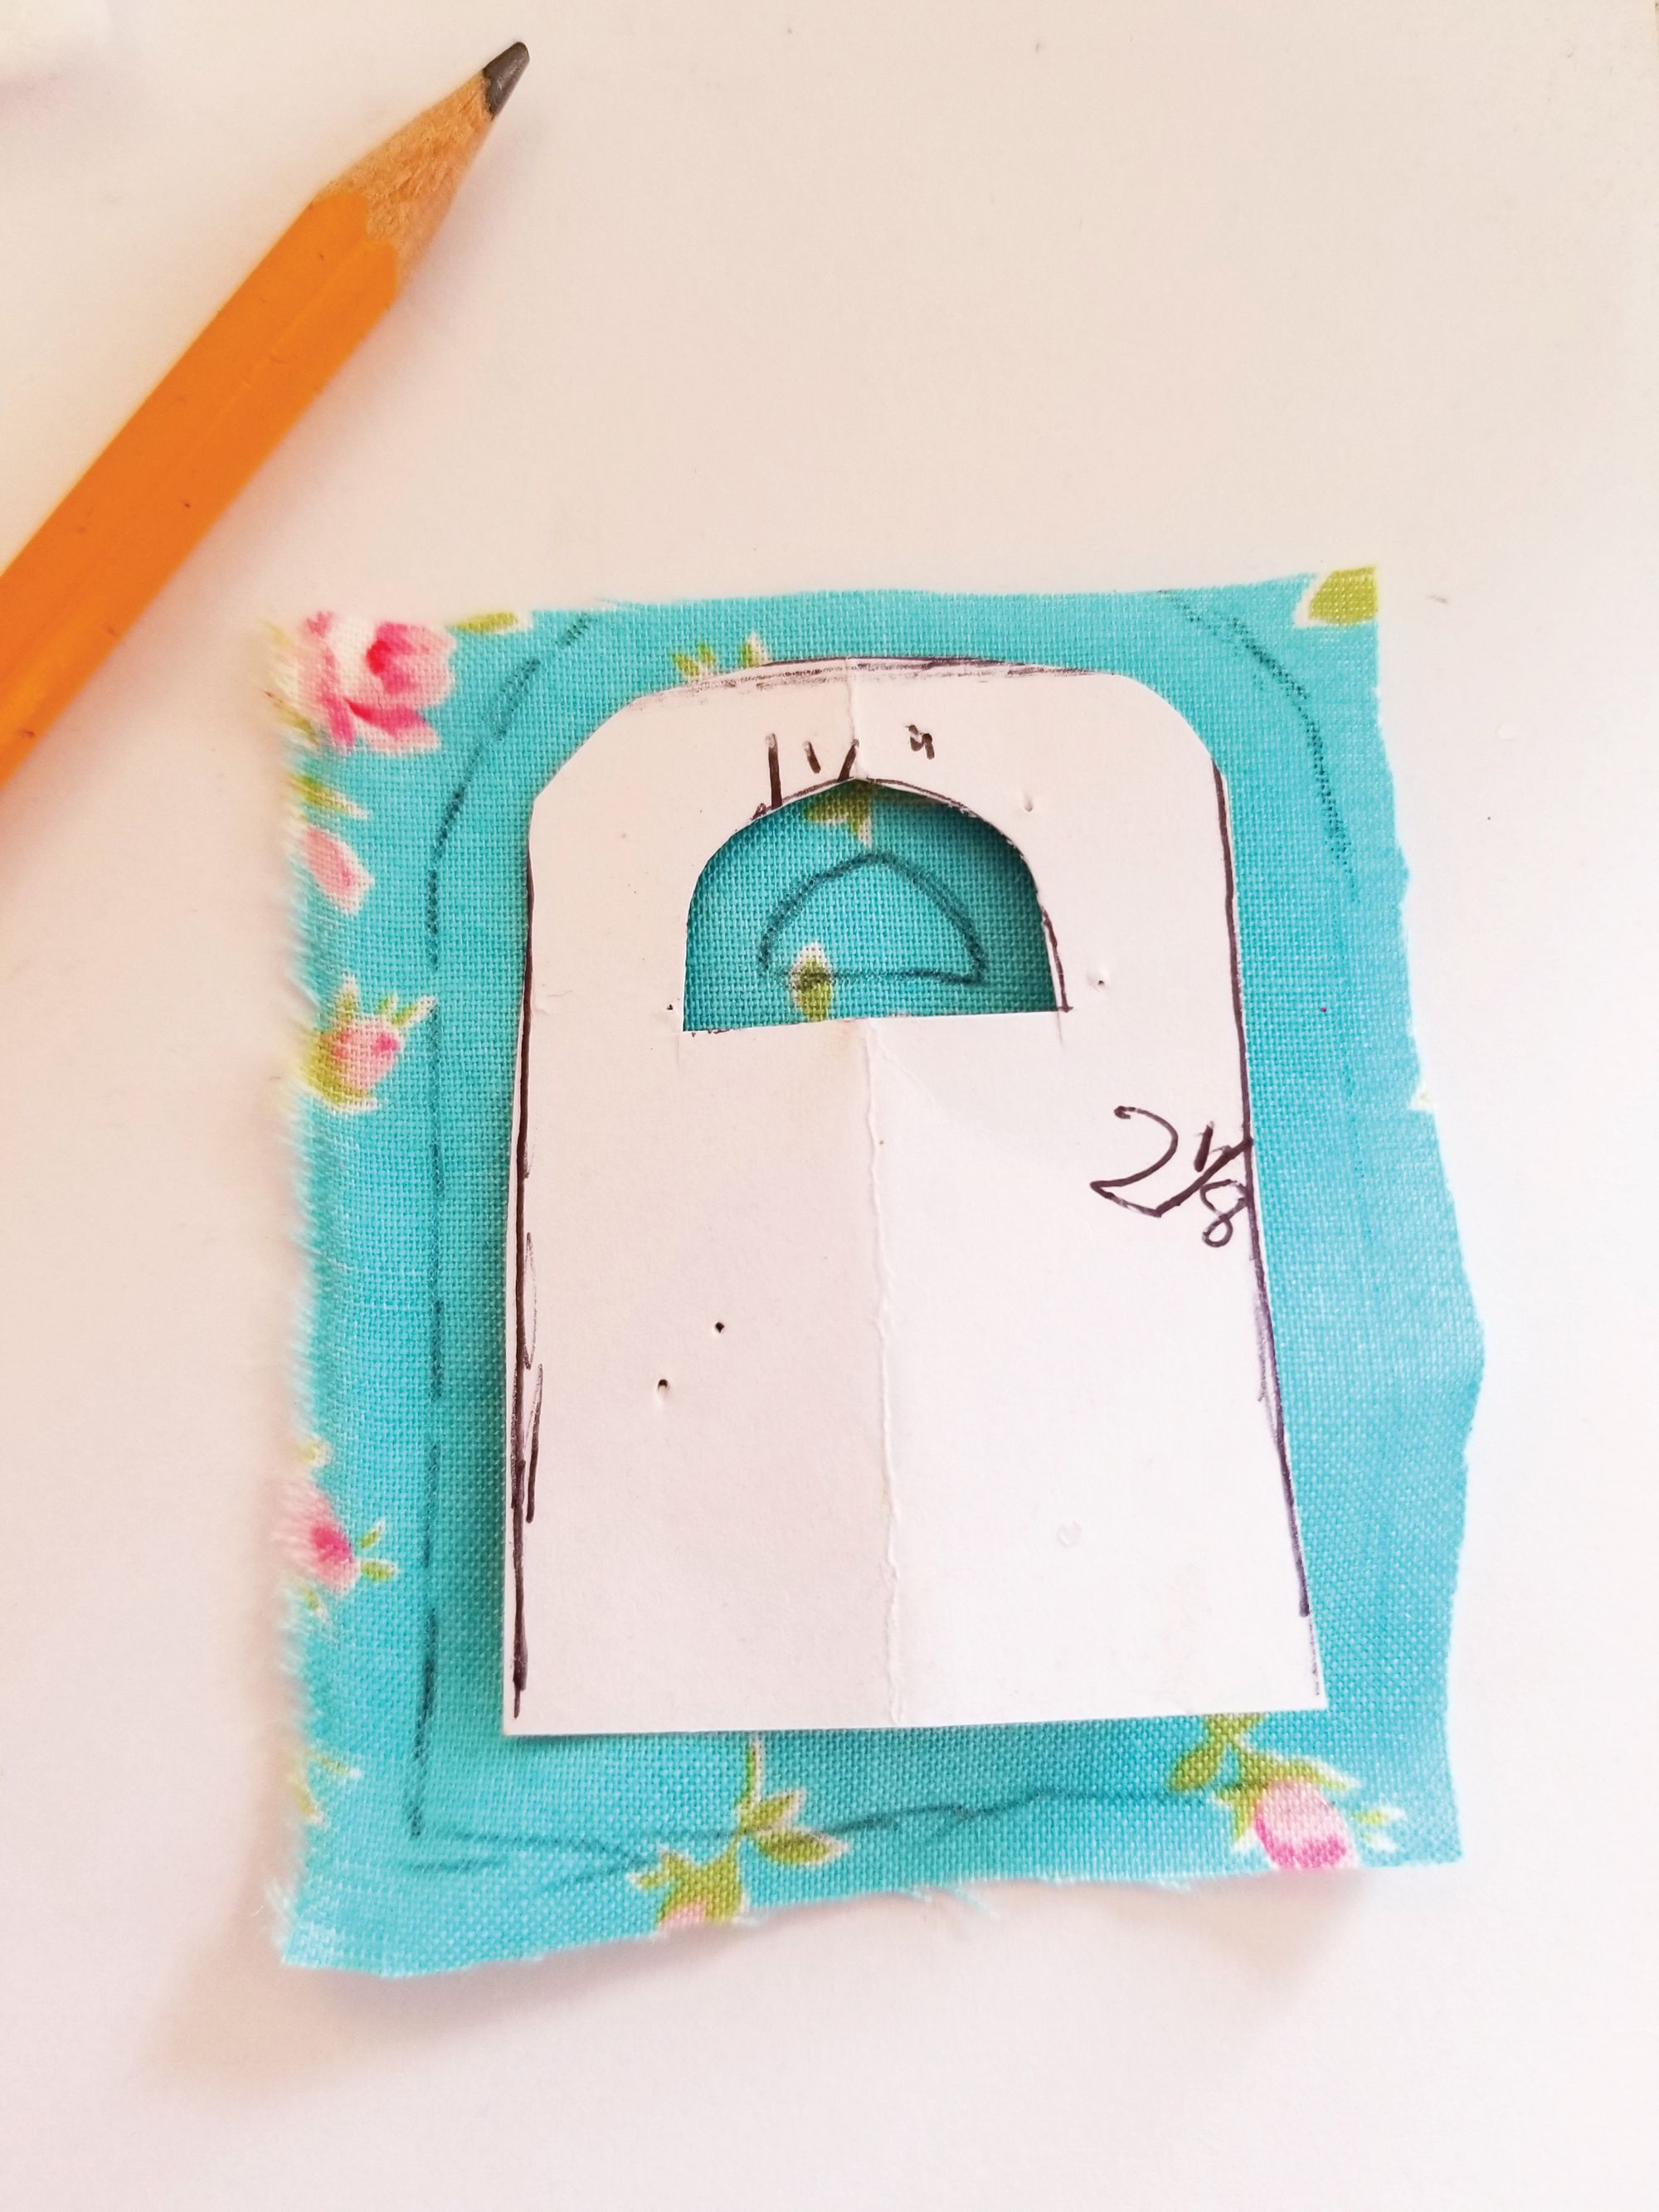
Step 1. Measure and cut a pattern from thick paper to 1 1/8” x 2 1/2”. Fold the front pattern piece in half lengthwise and cut out the inner window area. While folded, cut and round the top corner.
Step 2. Unfold the pattern and place on fabric. Lightly draw a cutting line on the fabric 1/4” larger than the pattern.
Step 3. Cut one felt piece the size of the pattern for backing.
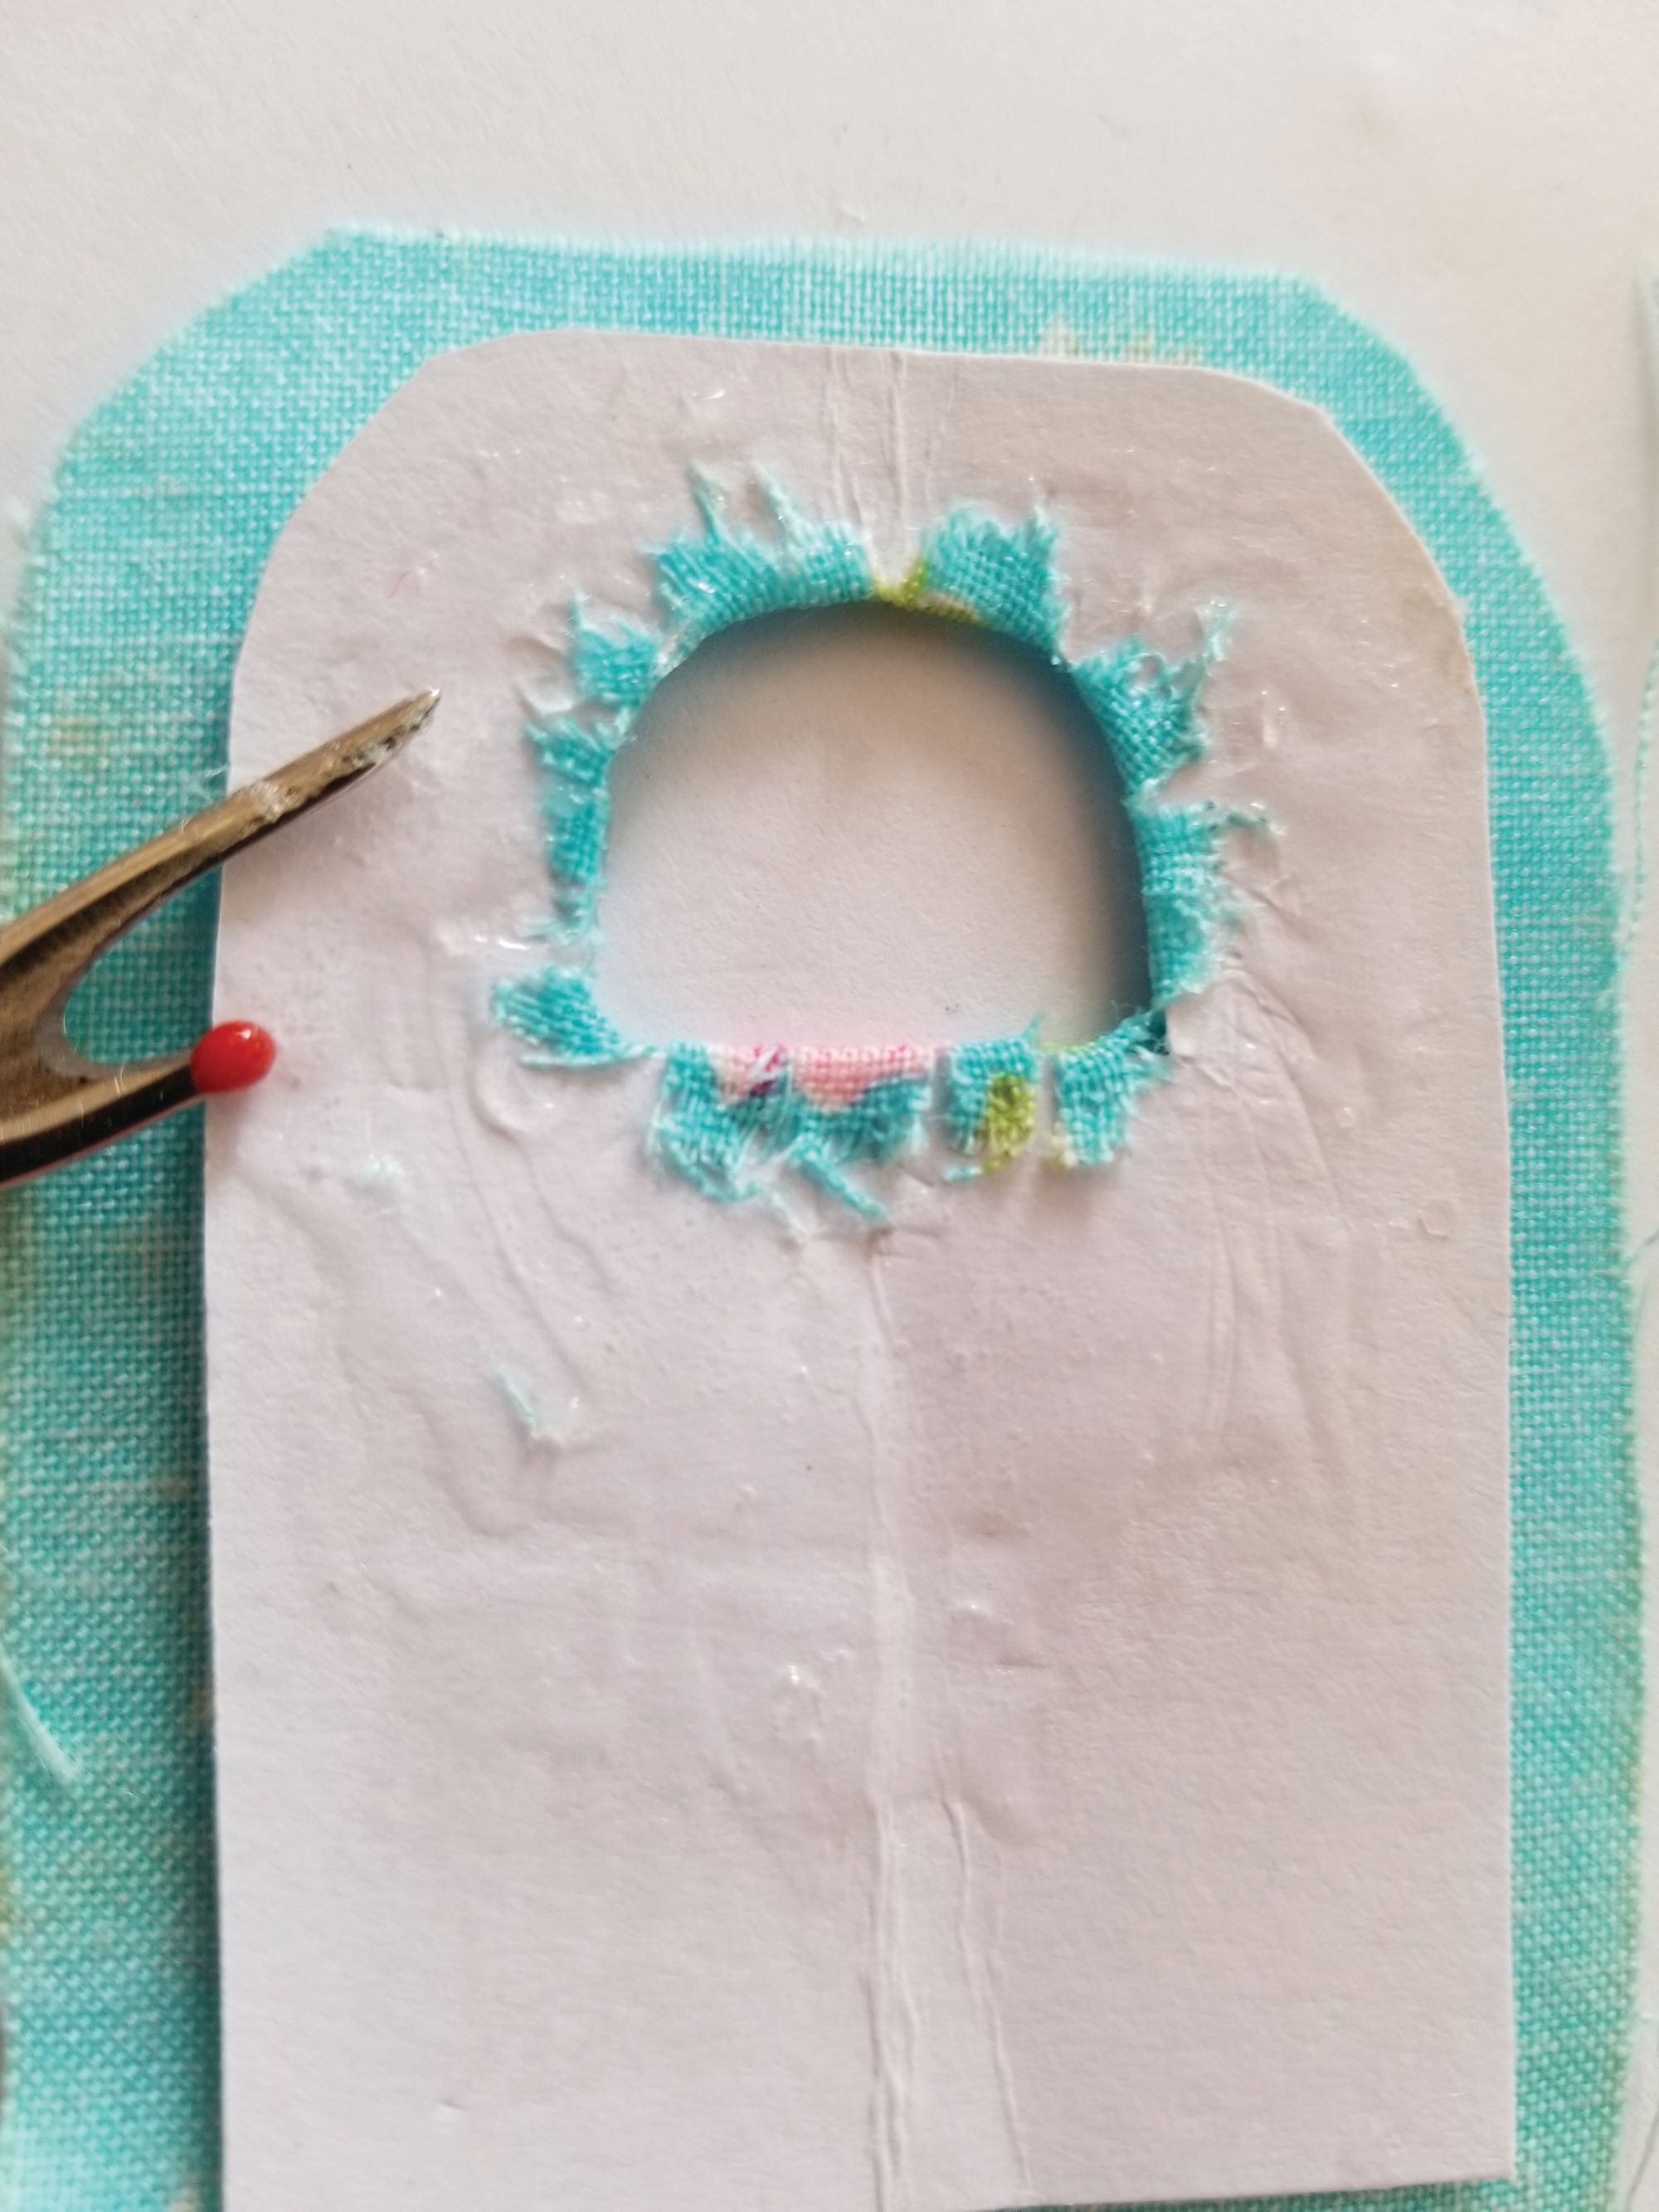
Step 4. Cut the edge of the fabric in 1/8” snips around the corners and inside the window so the fabric can be folded over easily.
Step 5. Place the paper pattern on the wrong side of the fabric. Using a toothpick apply glue to the paper pattern all the way to the edge. Using a clean toothpick, fold the fabric over onto the glue. Fold the fabric over on the outside edge and then the inside window area. Let dry.
Step 6. Once dry, place the front piece that is covered in fabric over the back piece of felt.
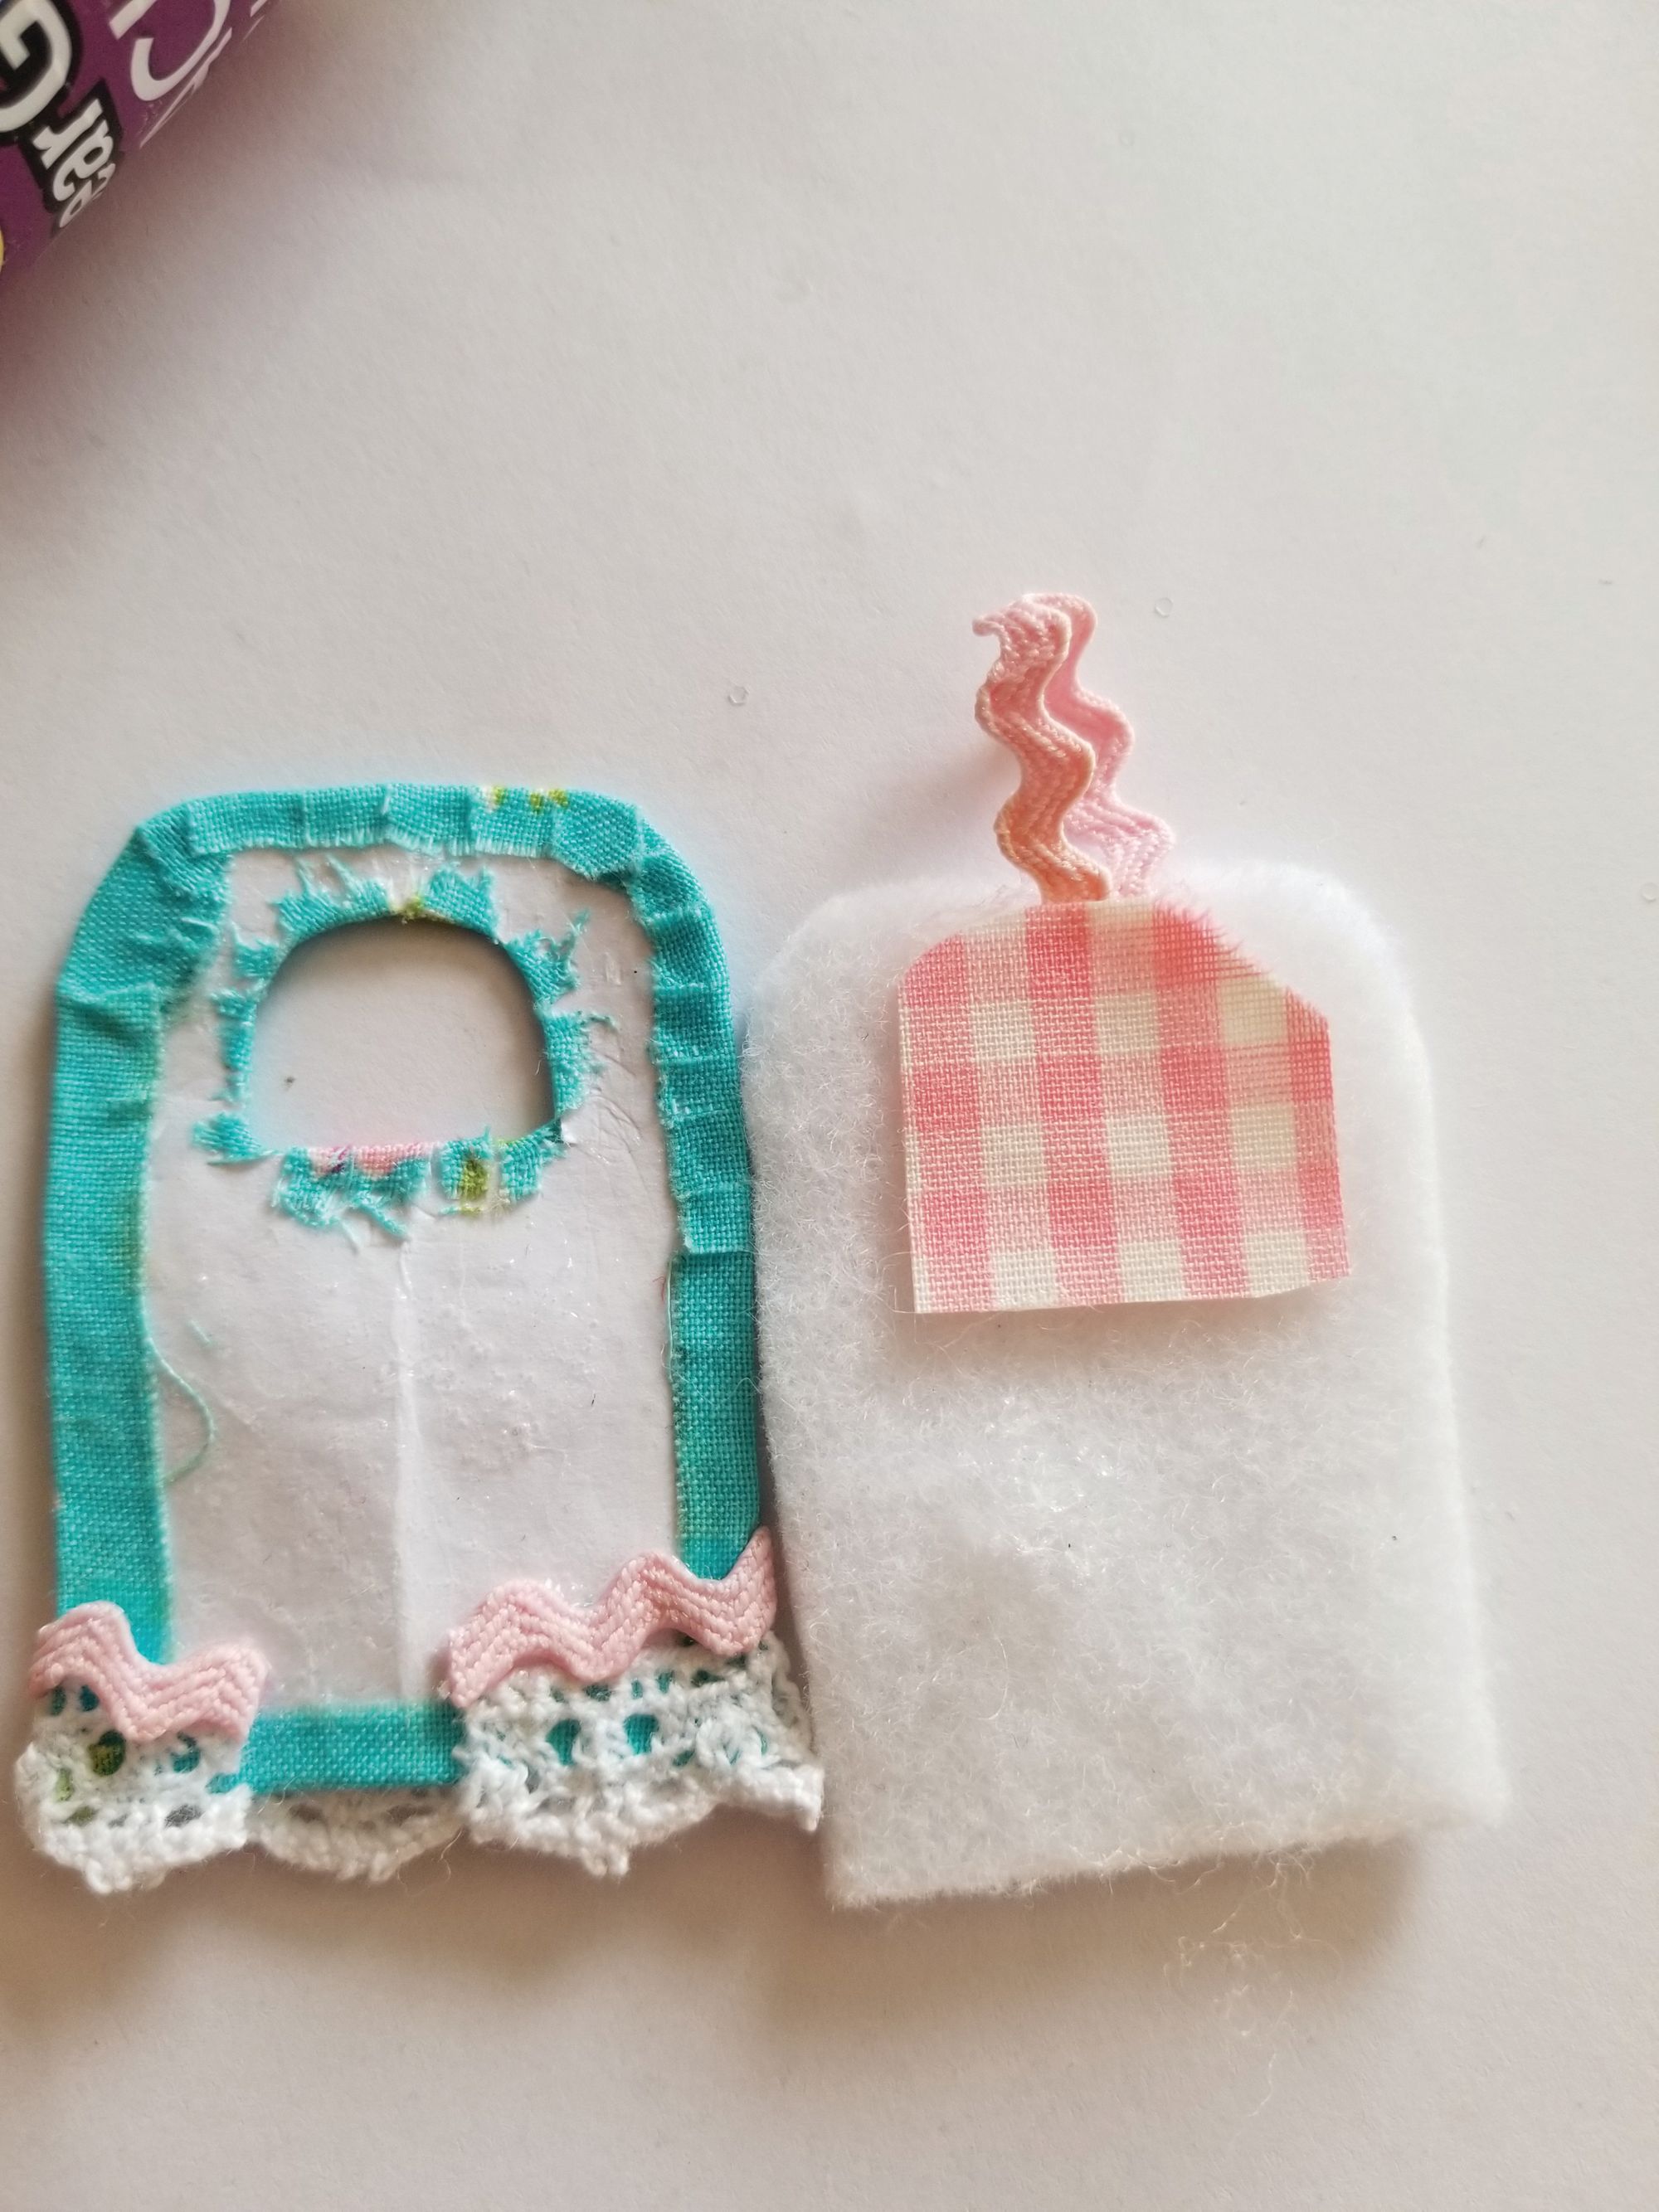
Step 7. Cut a 1” square of gingham cotton. Place in between the pieces to show through the window. Glue in place. Do not glue the front to the back yet.
Step 8. Measure the lace so that it covers the front bottom edge and folds over the sides about 1/4”. Cut the lace. Apply glue with a toothpick on the bottom side and lay the lace across the bottom edge. Do the same with the rick rack, applying it to the top edge of the lace. Fold the sides of the lace and rick rack to the back side. Let dry.
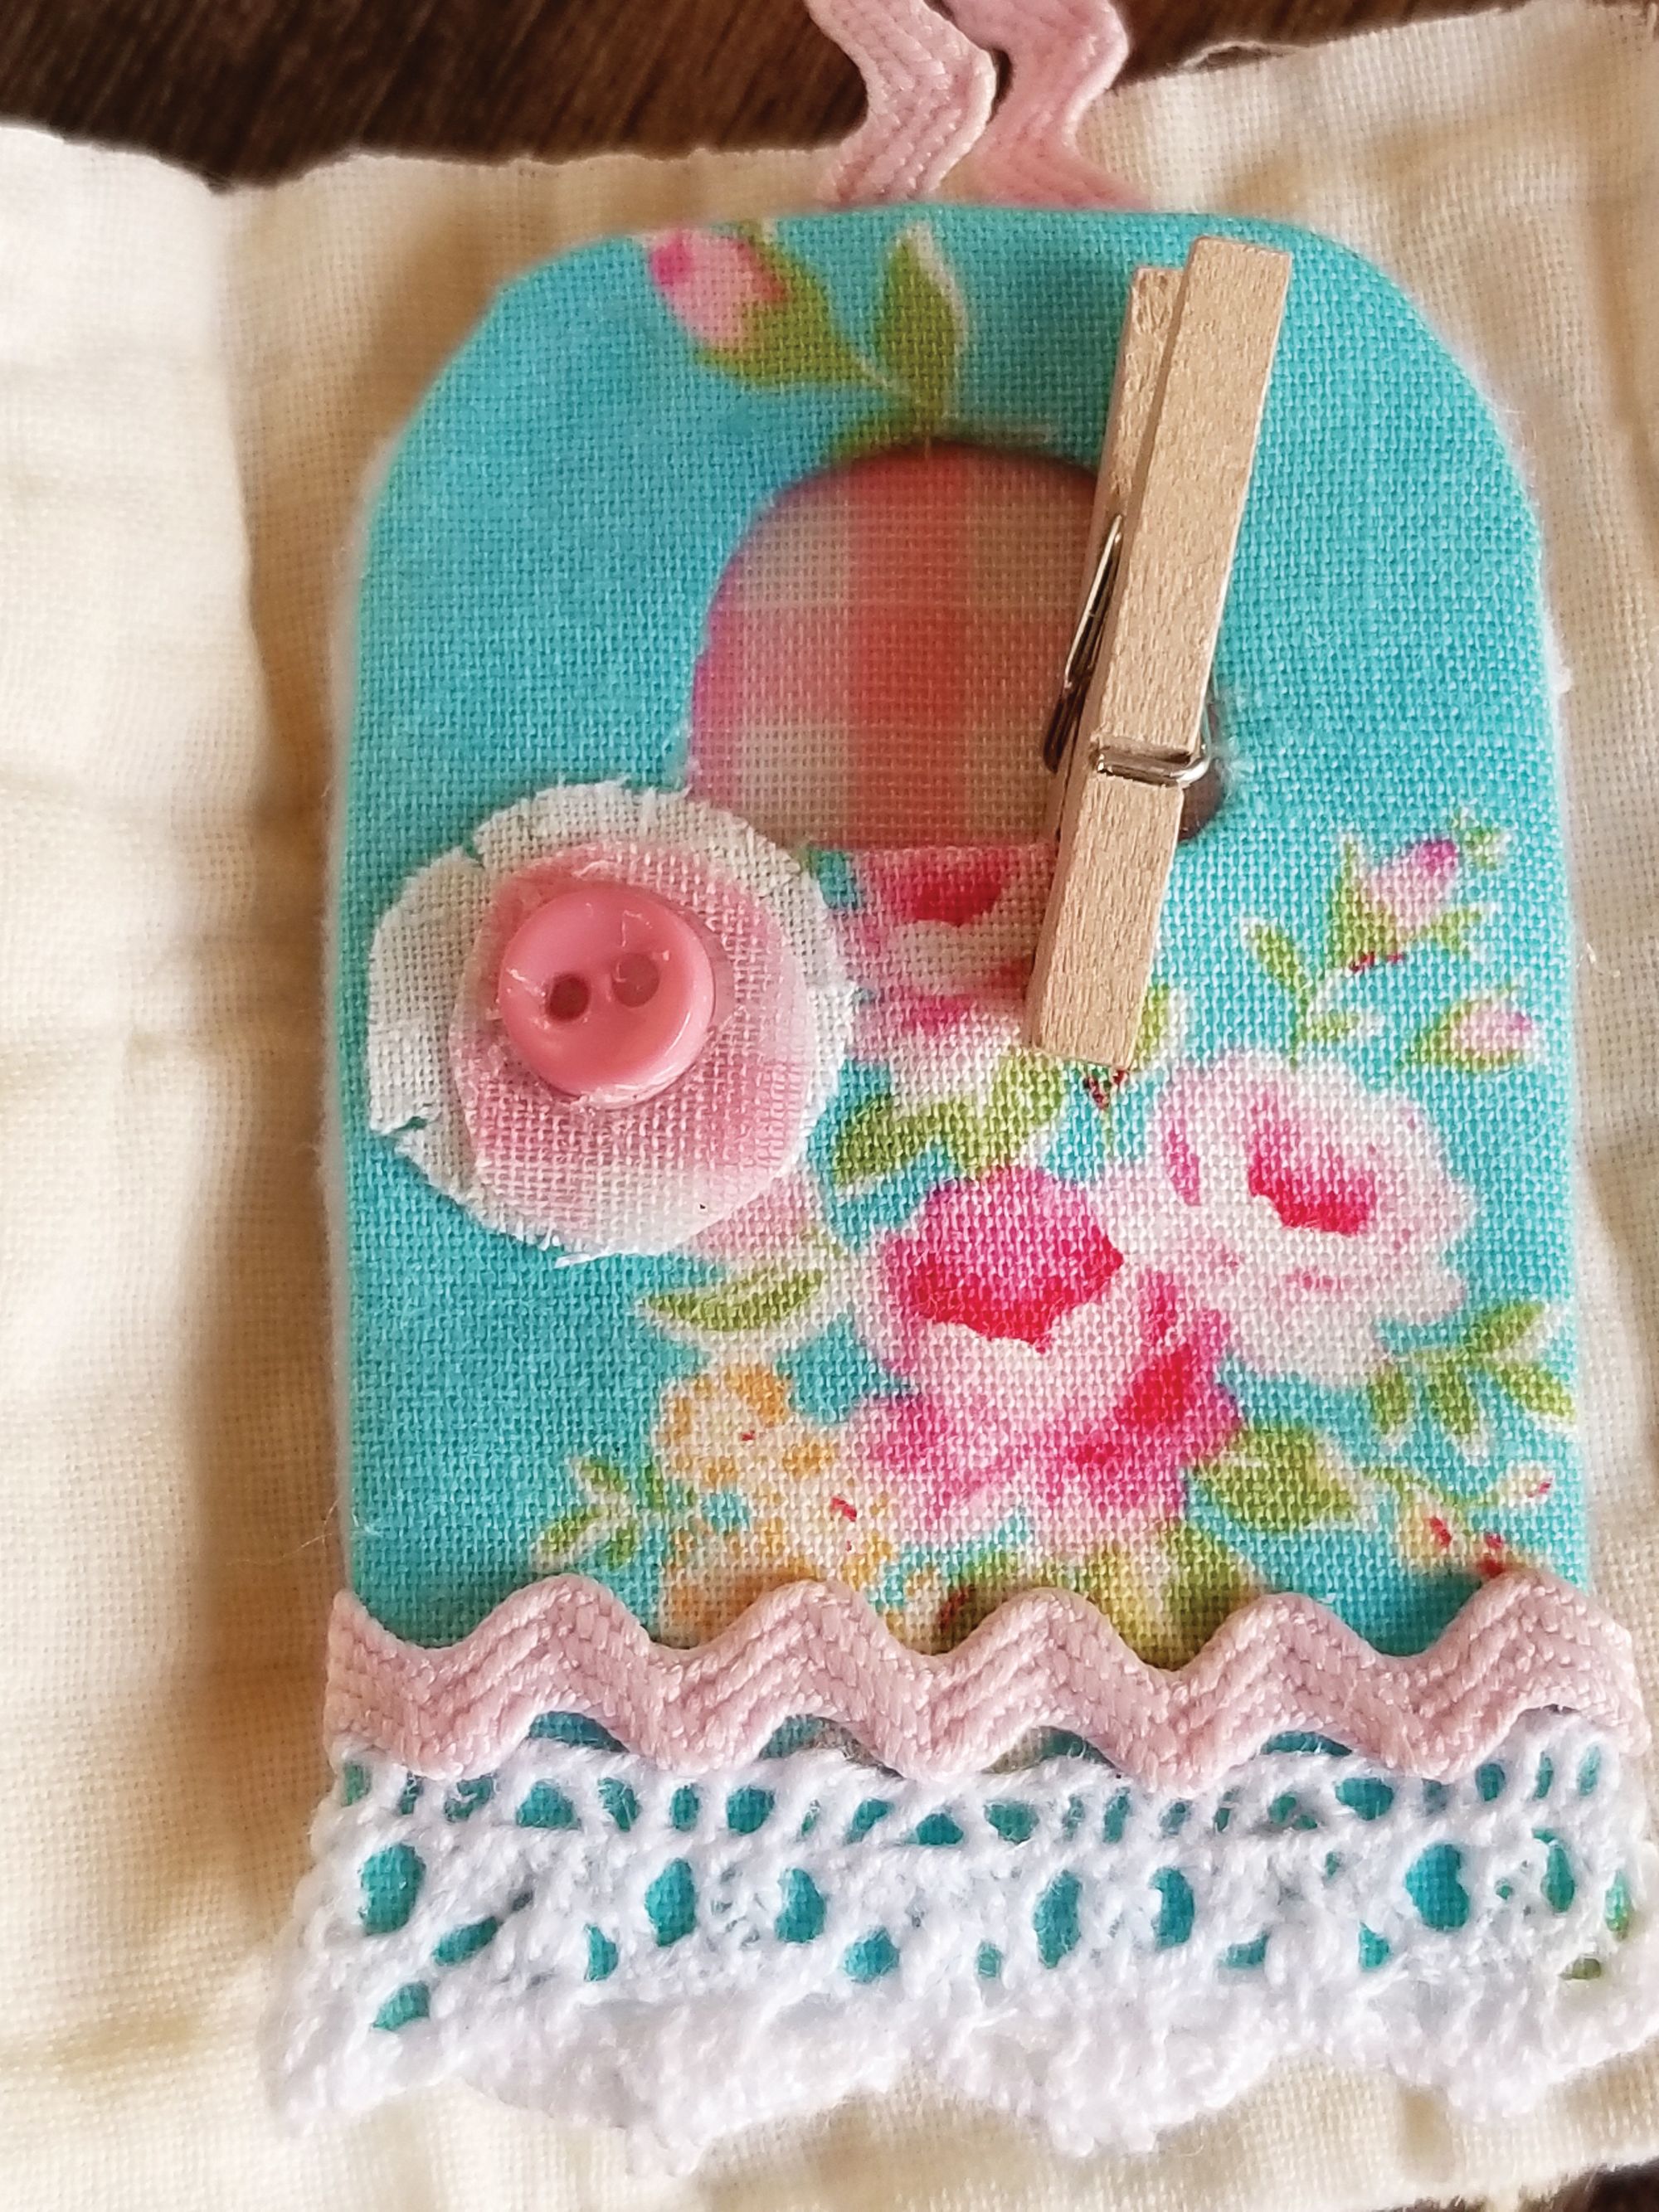
Step 9. Cut two circles of gingham cotton fabric (trace around a pencil eraser). Glue the two circles together and glue on the peg bag. Glue a tiny button on.
Step 10. Before gluing the front to the back, cut a 1” piece of rick rack and fold it in half creating a loop for hanging. Glue this to the centre top of the back.
Step 11. Place the front piece over the back piece. Trim the back piece if necessary. Apply glue to the back, avoiding the window, and press the front piece on top adhering the two pieces together. Let dry.
Step 12. Attach 2 pegs to the inner window area of the bag.
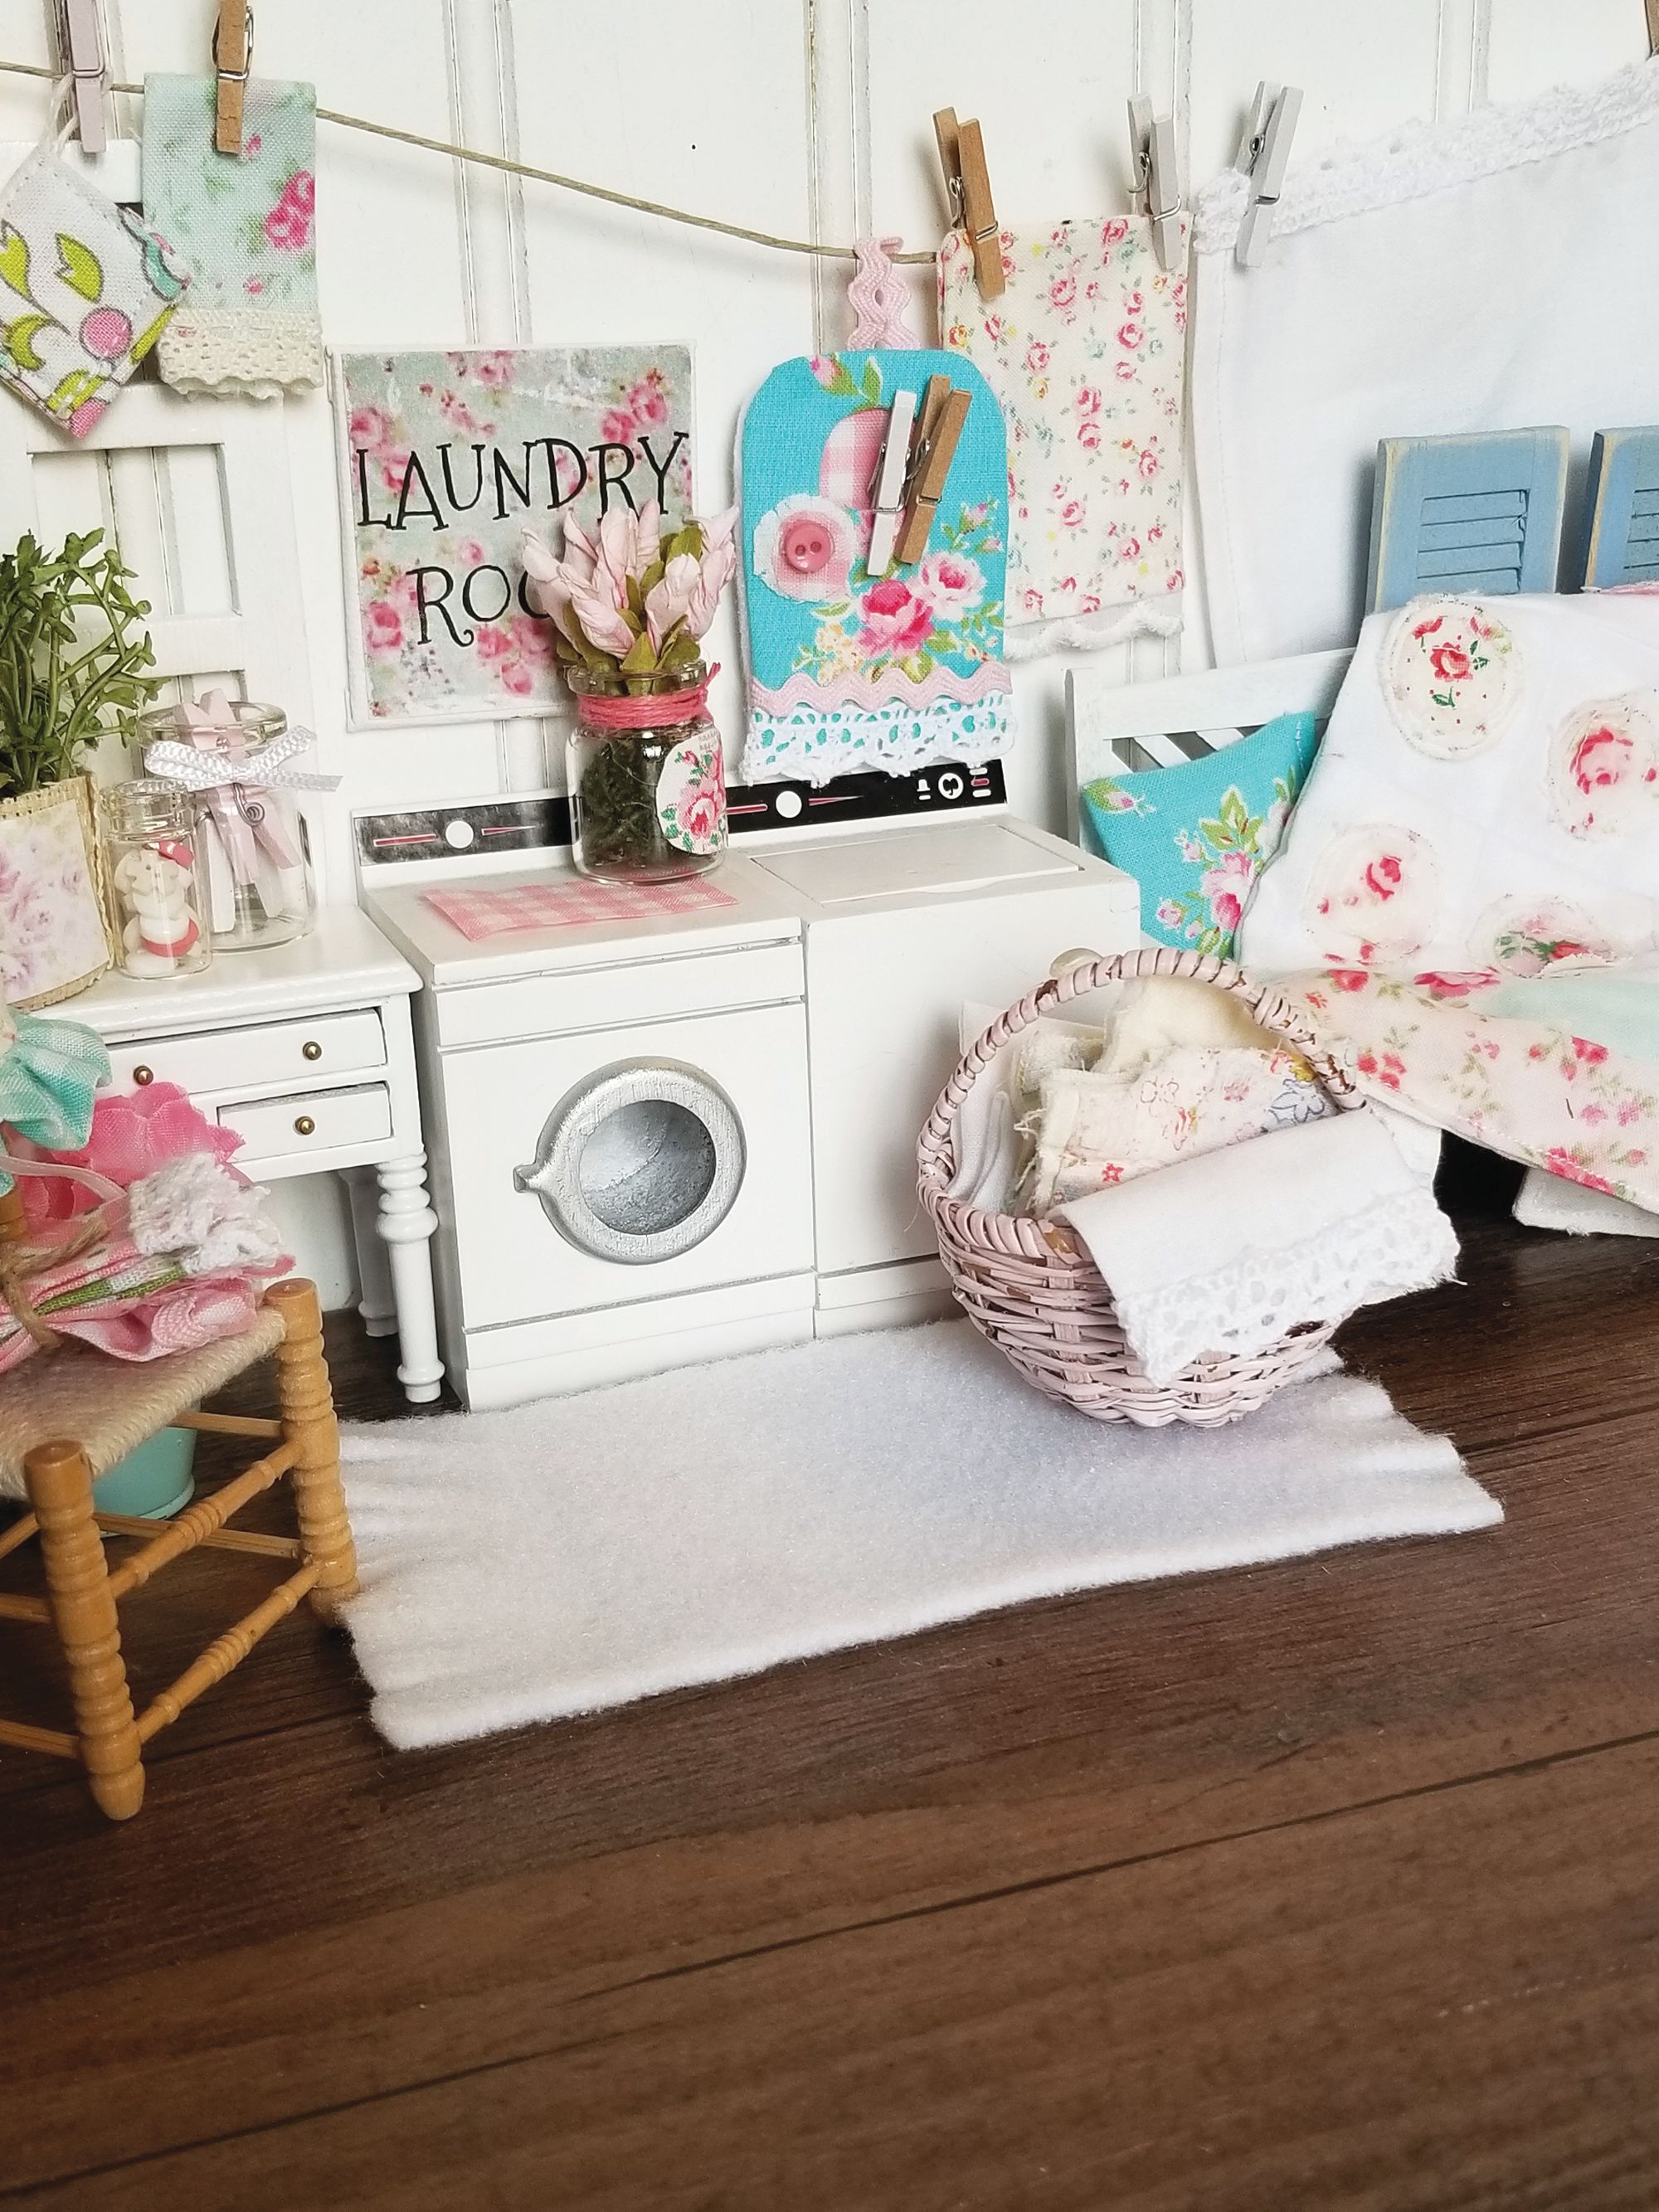
Find Debbie and Ribbonwood Cottage on Etsy:
ribbonwoodcottage.etsy.com