by Becky Winsor
There are several tiny “fixed wing” naked dolls wrapped in nothing but tissue paper, tucked away in a plastic box on a shelf in my work room (or TV room or bedroom or music room).
I can crochet, knit, sew, and glue mini clothes for mini dolls, but when their tiny arms and legs cannot be moved, I have issues. I once experimented with gluing bunka, all crinkled up, to tiny heads for hair, and that worked well; so, I decided to try gluing it to the “tiny hineys,” and that works quite well too. It’s inexpensive and really takes very little time to dress a mini baby.
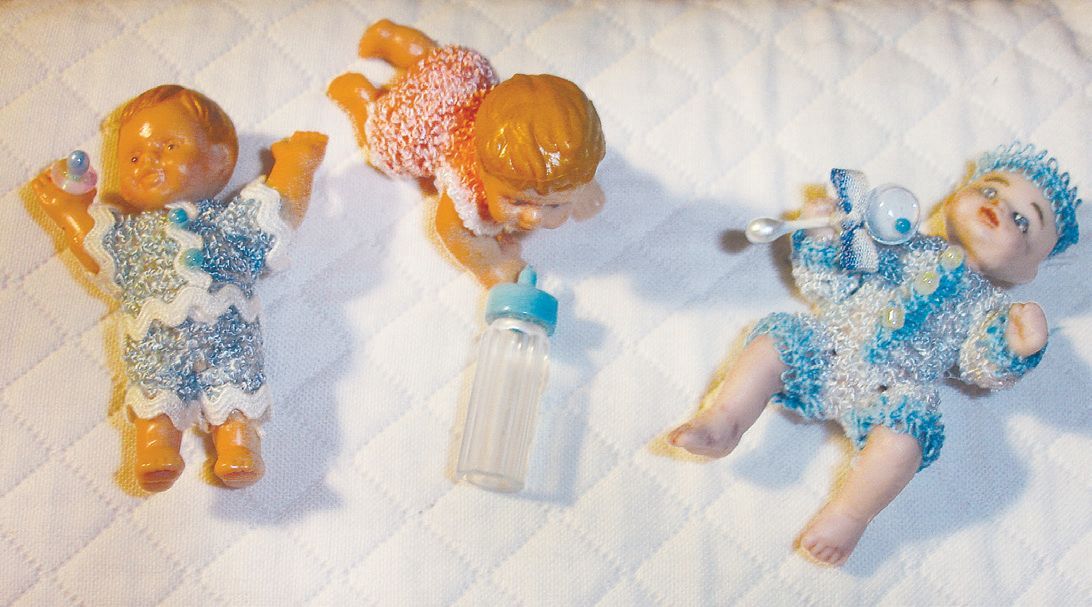
Thanks to my dear friend Nola MacDonald in Canada, I have a near-lifetime supply of bunka in a vast colour range. I also had a porcelain baby given to me by another dear friend, Ann Kimler from Port Angeles, Washington, so I decided I’d start with him. I was amazed to find many mini baby dolls are “anatomically correct,” which is just too funny. Makes you want to just leave them naked, lying on a changing table!
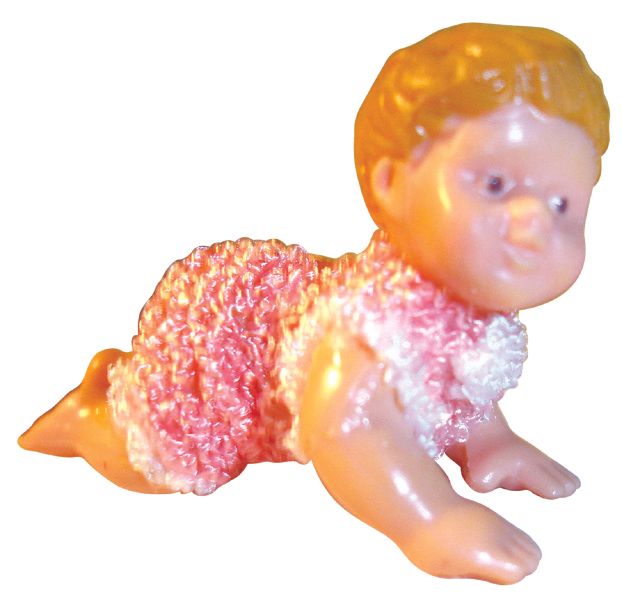
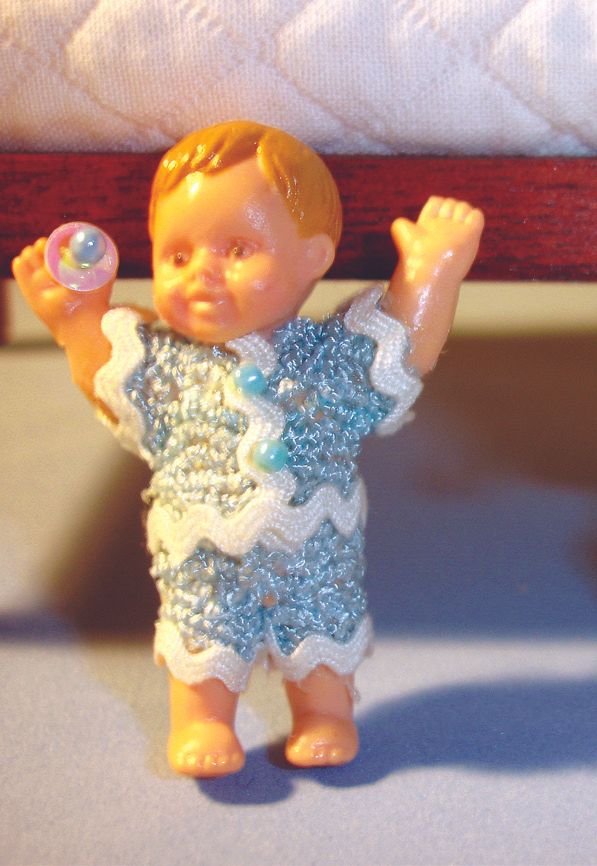
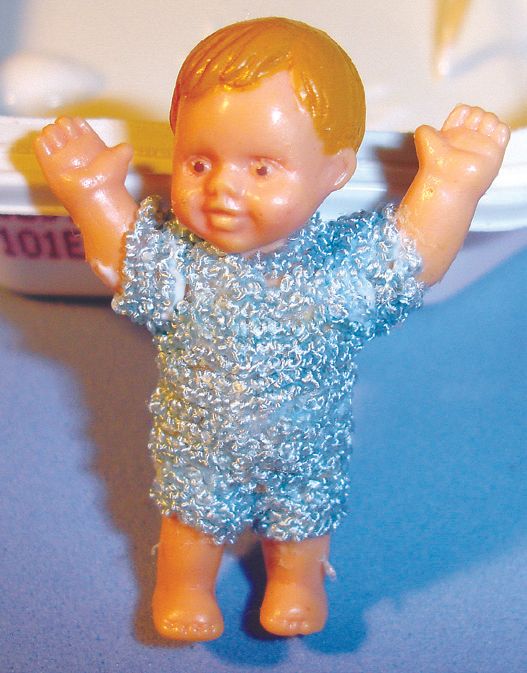
For the first little boy I used light blue bunka; a bit of tiny, darker blue trim; and three seed beads for his little romper. I didn’t make booties as his little toes are just too cute to cover.
Step 1: First, pick the bunka colours of your choice and “fray” the bunka by pulling a single thread from the end. The bunka unravels into a curly thread. Pull until you have about two feet of frayed bunka. Do that to as many colours as you plan to use. You can use a contrasting colour for trim, too.
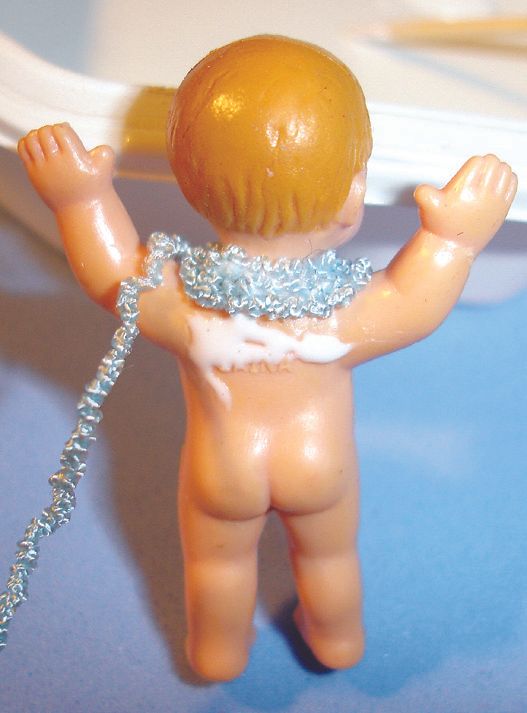
Step 2: This is my method for covering the doll, but you may develop a method easier for you. Using a toothpick, I spread glue, starting at the neck, down to about 1⁄4” of the upper body.
Step 3: Start laying the curly bunka around the neck and continue working around the body, down to just under the armpits. I use another toothpick to push the curly bunka into place, keeping the rows close together so there are no uncovered places on the doll. Don’t pull the bunka tight. Leave it loose and curly as you work it into place. Continue down the whole body.
Step 4: If there are gaps found later, I cut some real short pieces of bunka and glue them into those gaps. This is sometimes necessary in the crotch or chest or the back area between the arms. Just dab on some glue and push the bunka down well so there are no ends sticking up.
Step 5: Cover the arms and legs the same way. I start at the shoulder for arms and at the thigh for legs. Push the bunka well against the body bunka for a good cover. How far down the arms and legs you want to cover is your choice.
Step 6: Add any trim, such as buttons or pompoms, as desired. This part really adds a completed look to the clothing, as you can see in the photos.
I haven’t tried this on bigger mini dolls, but I suspect the crochet-style bunka would work well for sweaters to be worn under another shirt, vest, or jacket. The colours could be alternated for stripes. Have fun and let your imagination go wild.
When it’s all dry and decorated, doesn’t it look very similar to a crocheted outfit? Of course, I won’t tell if you won’t.